
 I planned to join a 160m SOTA summit-to-summit attempt in April 2017 and so obviously needed a 160m capable antenna that could be carried to the top of a mountain – not so easy at that wavelength.
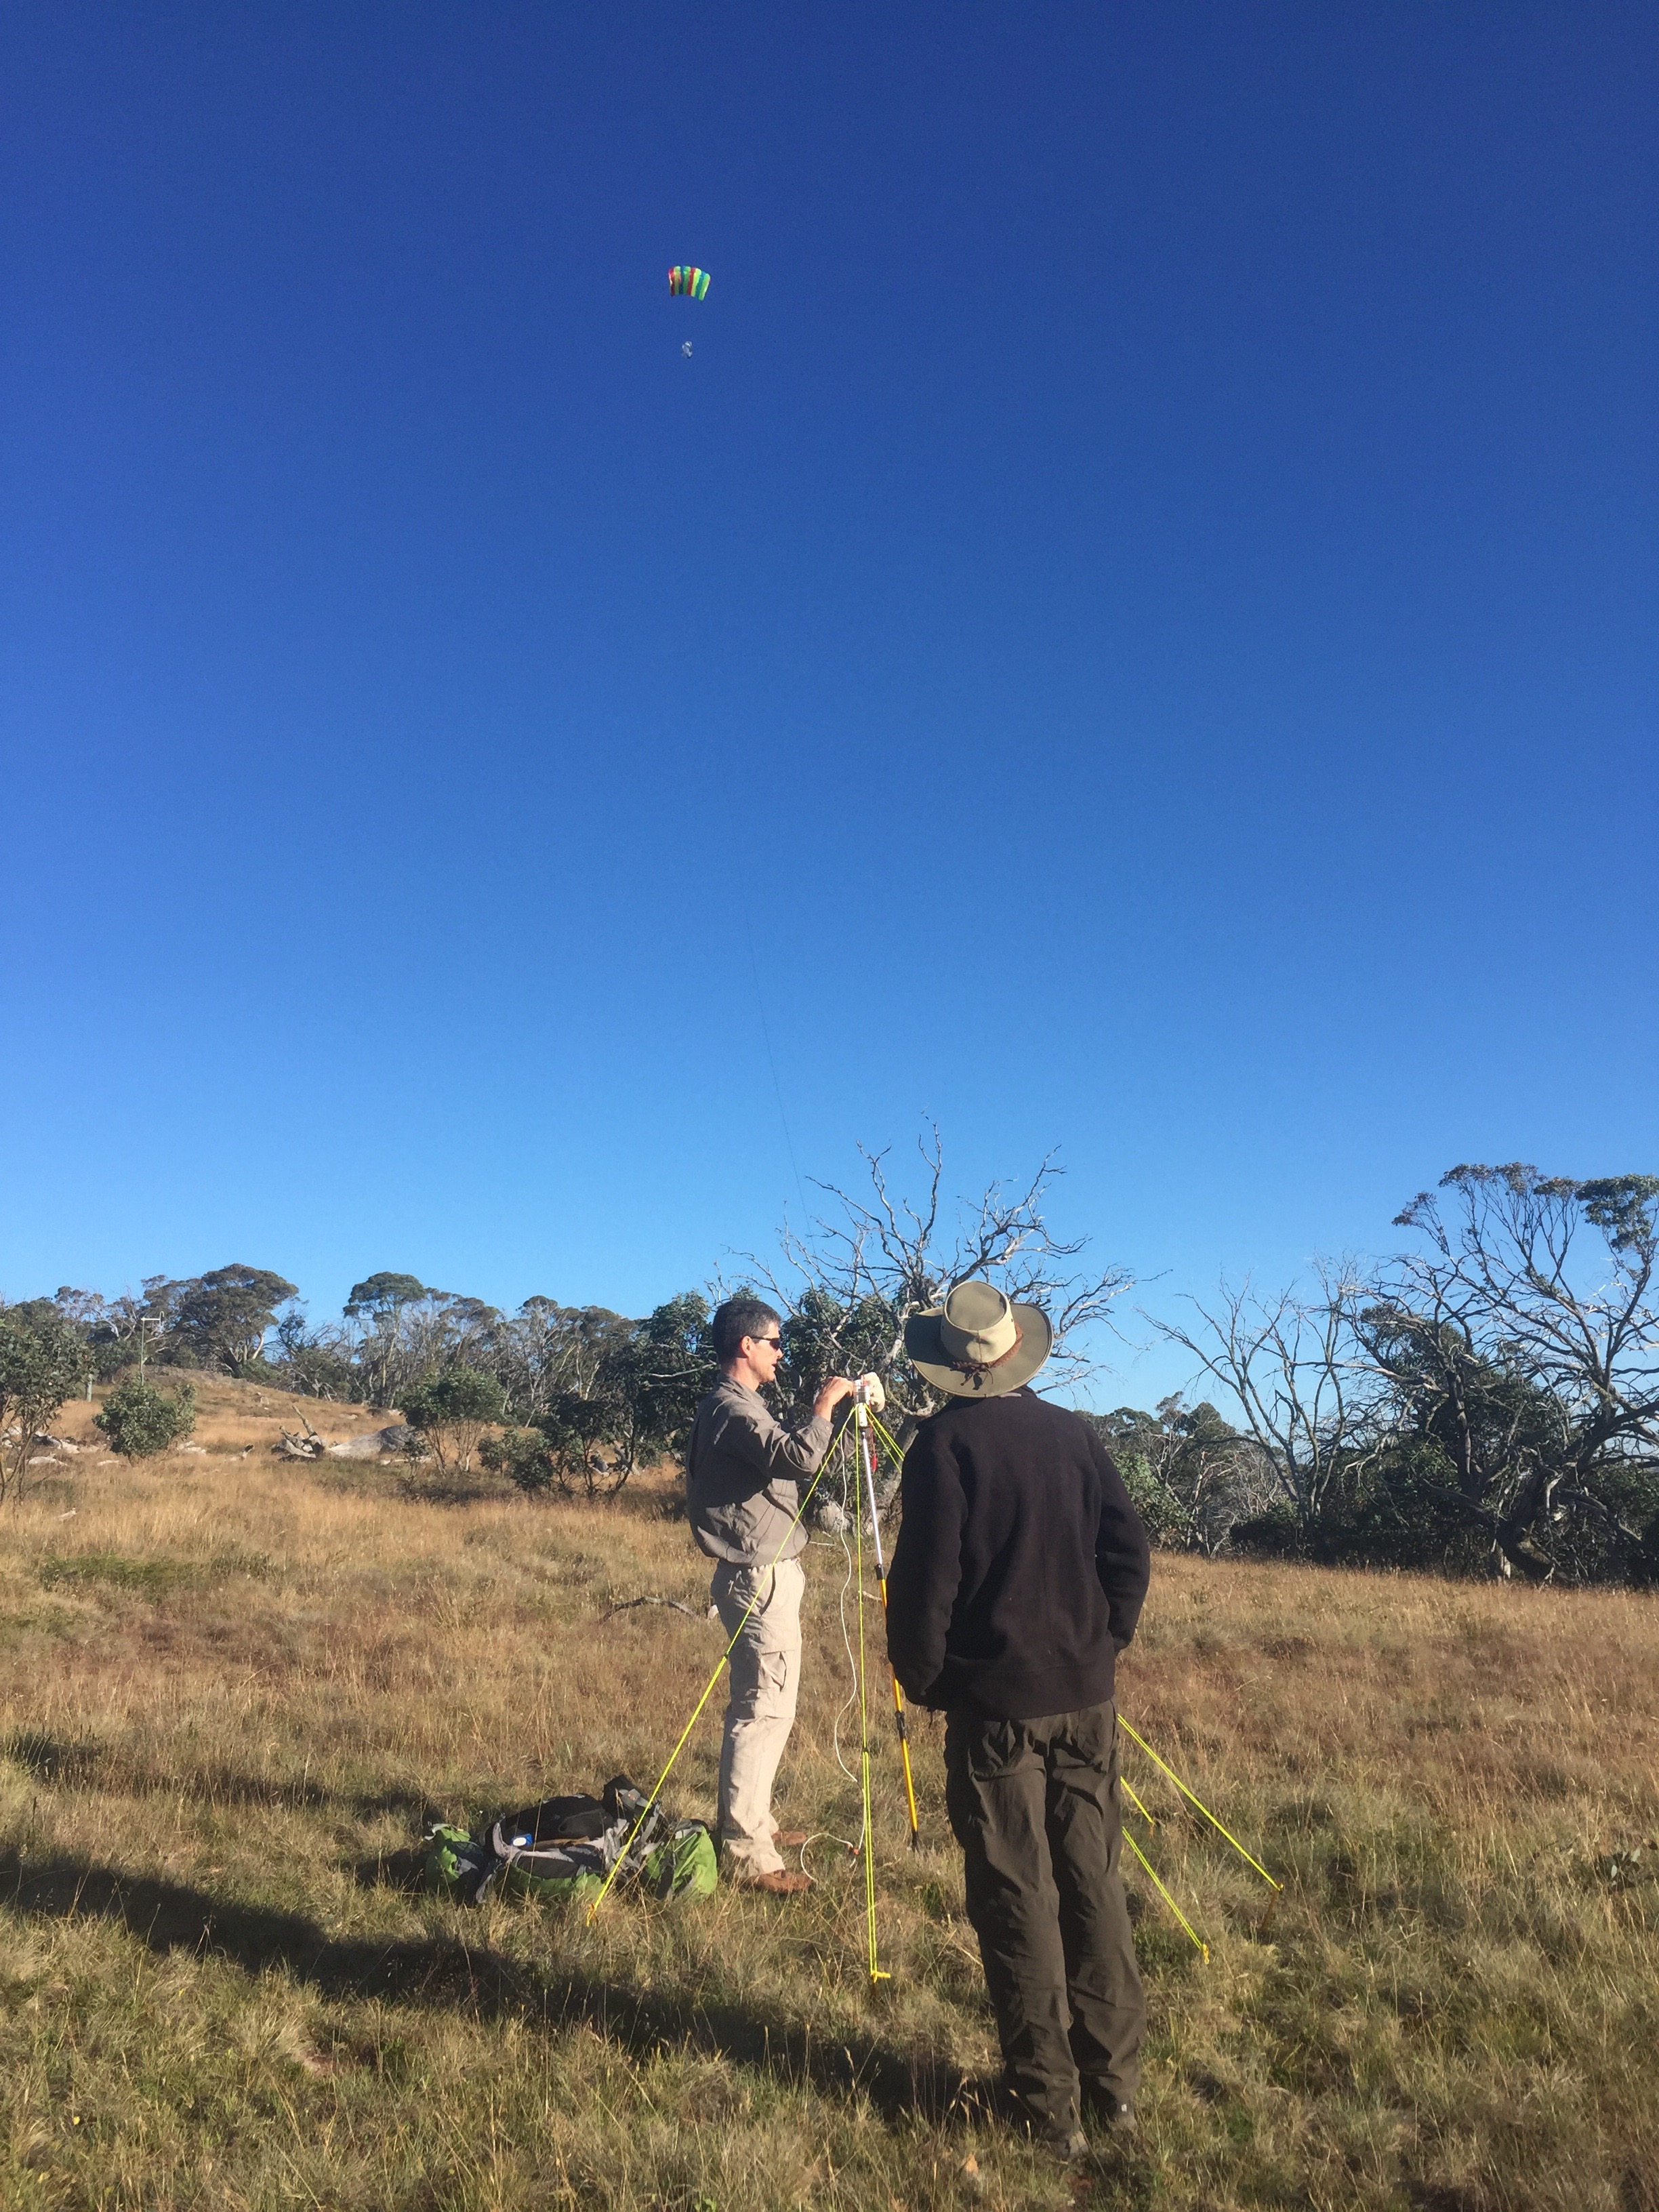
The first antenna I built was a kite antenna based on the design by Steph VK5ZVS. That seemed to work well, but as plans evolved, the event looked like being held on dusk when kite flying from mountain tops would become challenging. So I also rapidly built a loaded squidpole vertical which is what I used for that event.
This page documents both these antennas for anyone interested.
40-160m EFHW kite antenna
I had always thought a kite antenna would be a fun way to get an antenna in the air for the low bands on SOTA summits. By their nature, summits tend to get more wind than flat lands – altitude and the Bernoulli effect.
I read a number of sites, but in general kite antennas seemed to be quite complicated. Then I came across Steph VK5ZVS design for a 160m kite antenna. Steph’s design was for a 1/4 wavelength vertical attached to an auto-tuner on the back of a car. It was simple in that he used stainless steel fishing trace as both the kite line and the antenna wire. The length is of course continuously adjustable via the reel and hence it can be tuned to any frequency. Obviously not very useful on 10m though!
I’ve liked EFHW (End-Fed Half Wave) antennas for portable ops and so I immediately thought of a vertical EFHW for 160m – that’s a lot of line!
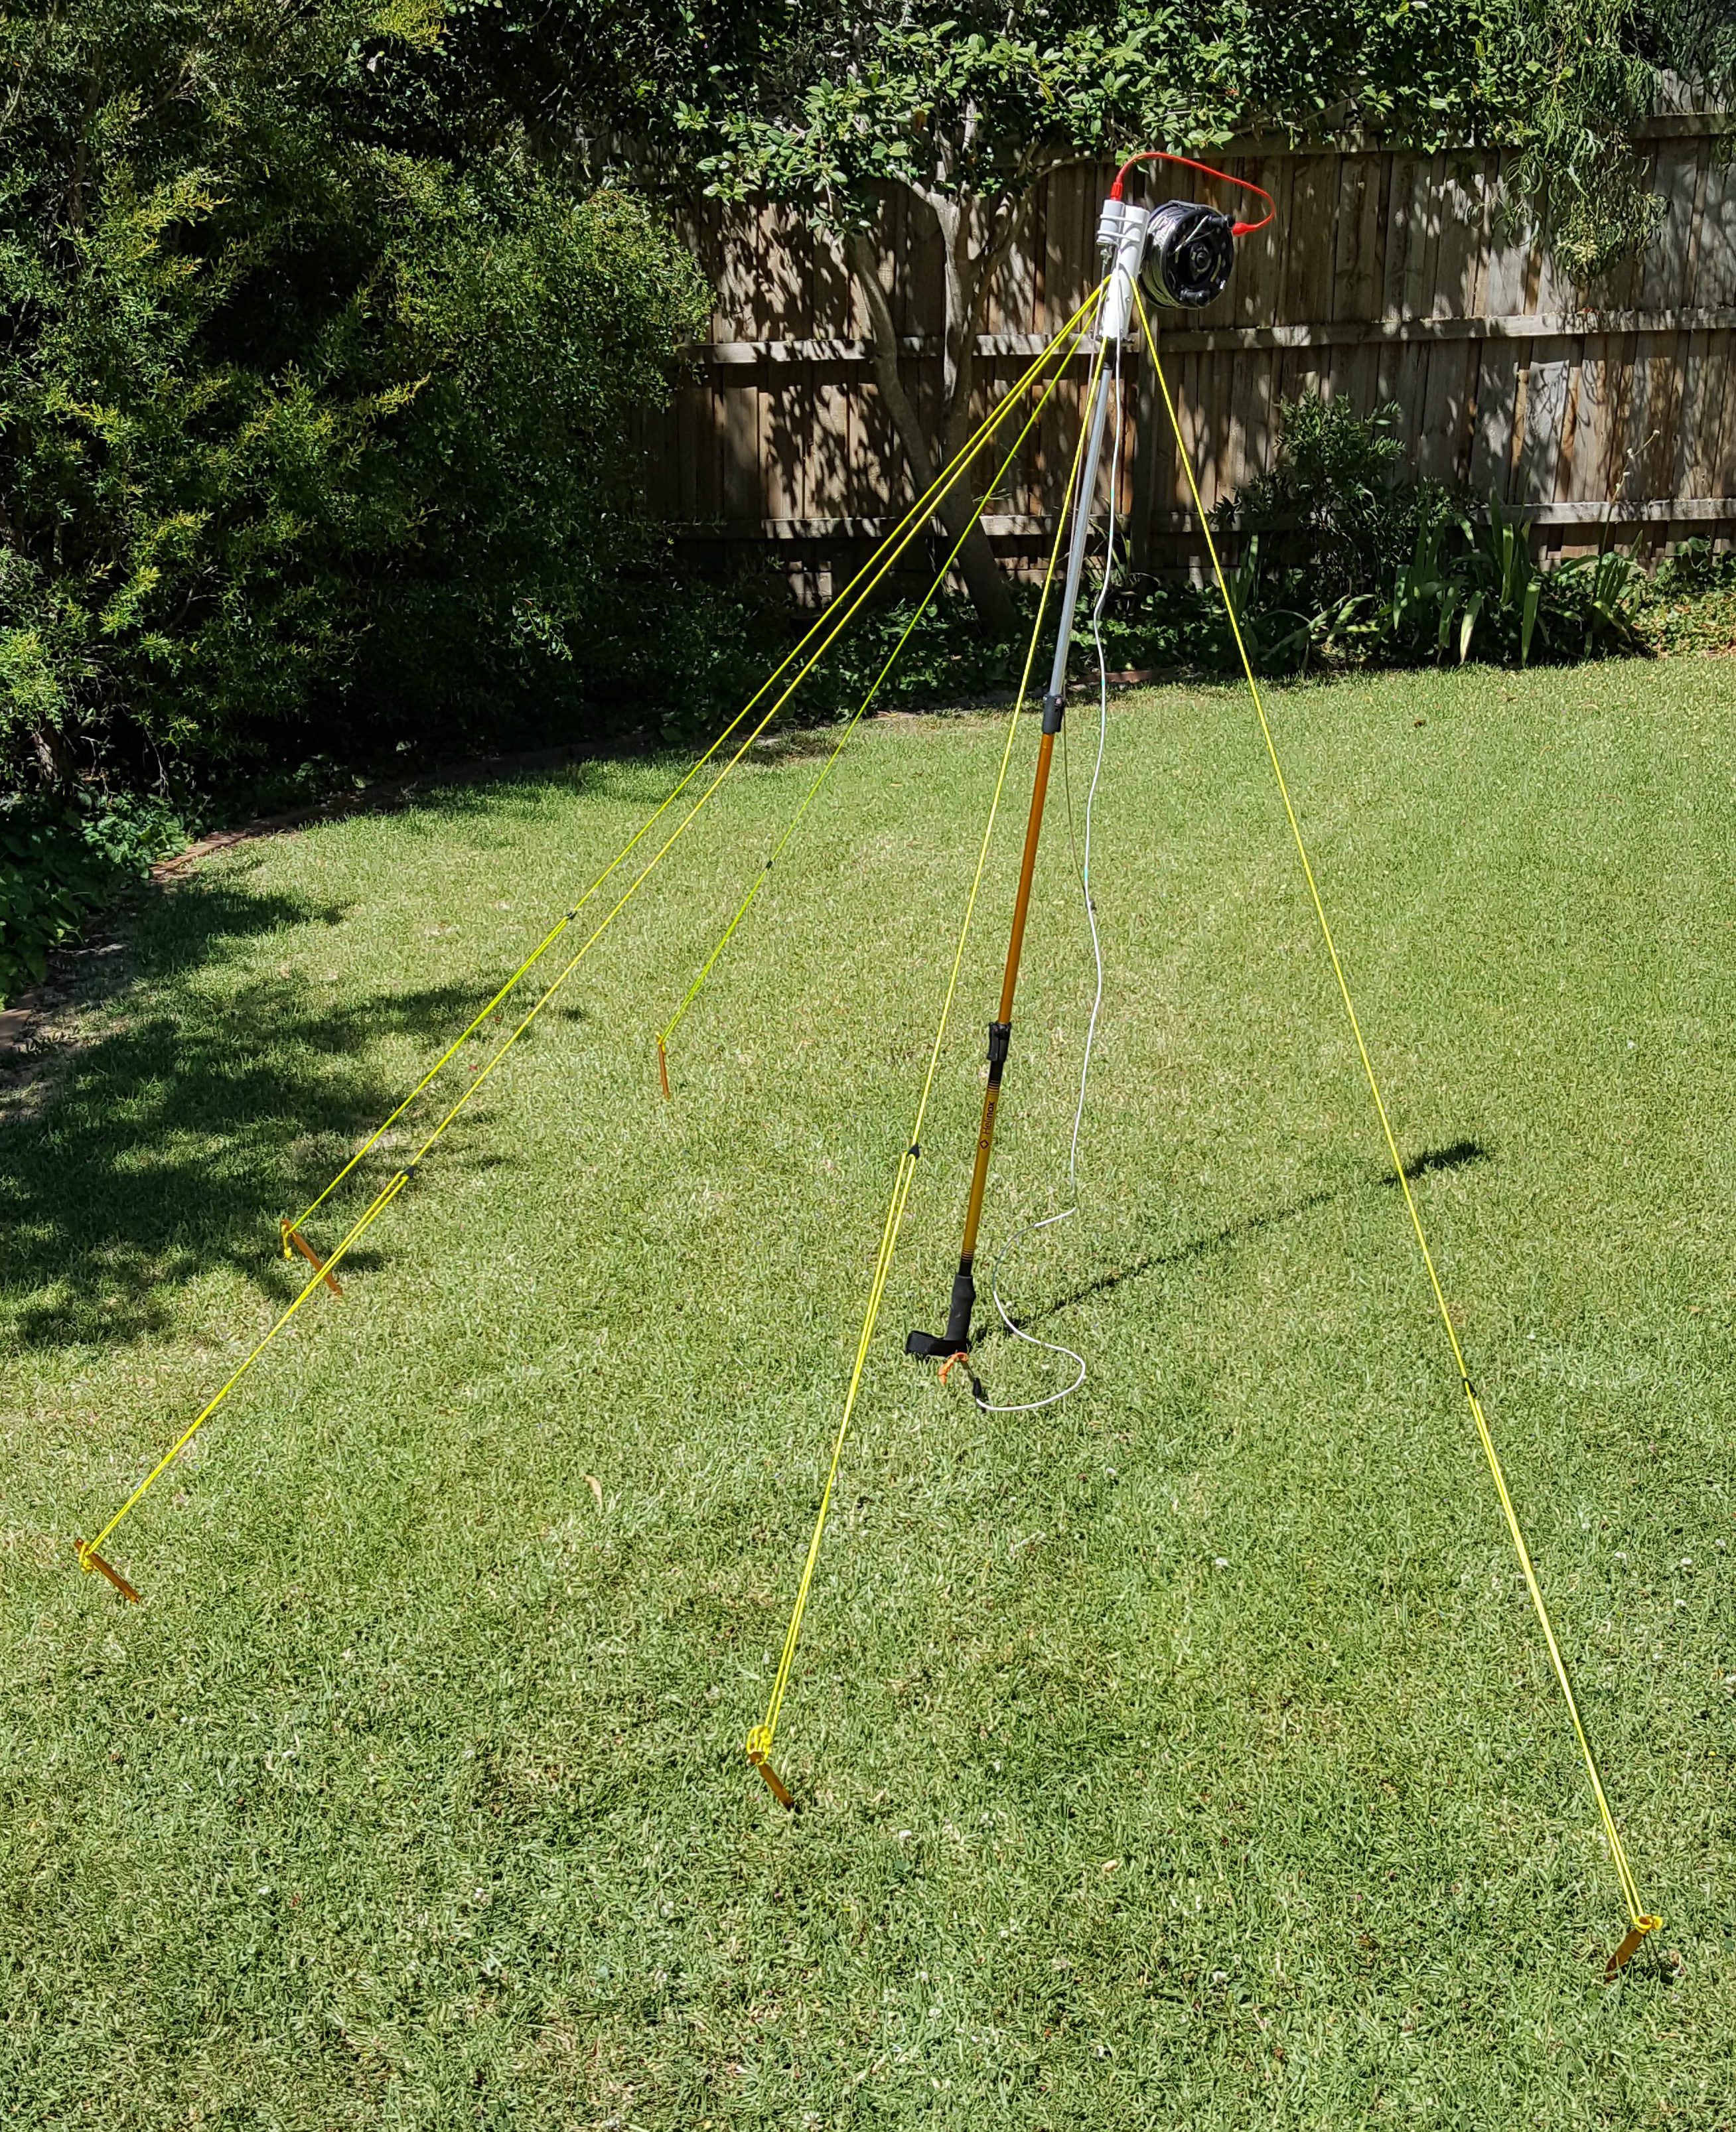
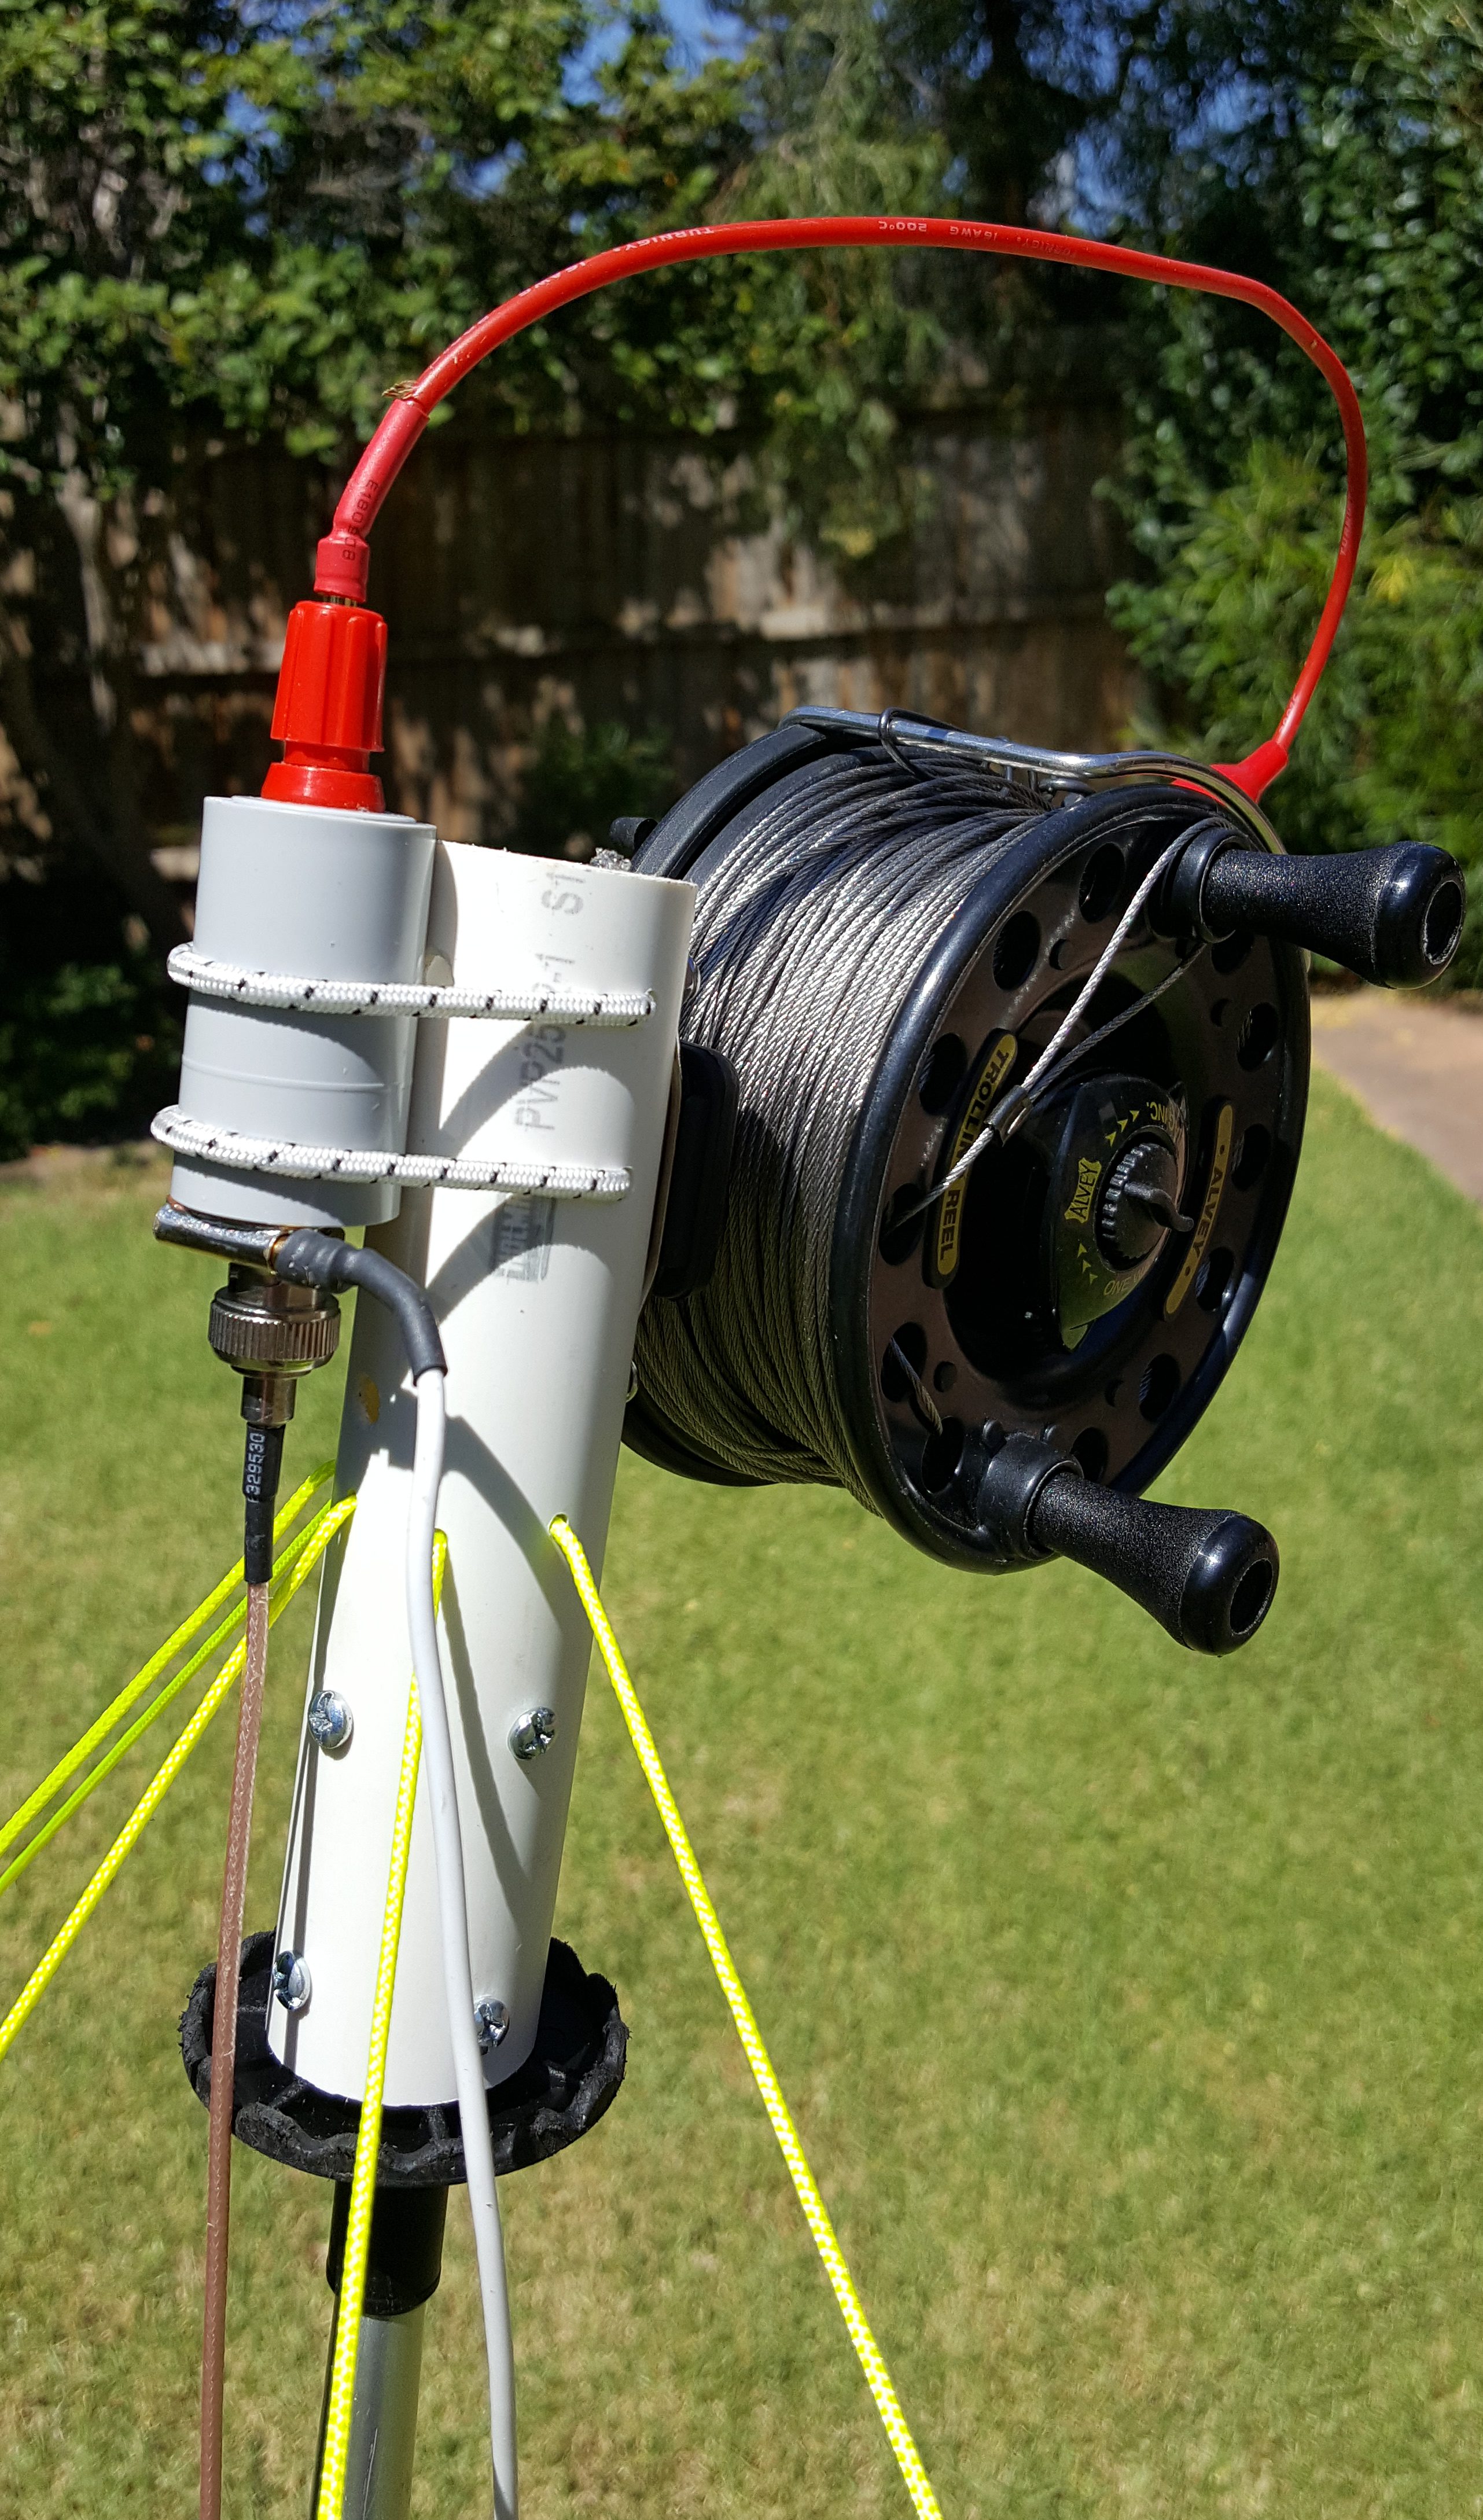
The guy lines take the strain of the kite line while the hiking pole holds the reel clear of the ground.
The first challenge then was to find a kite that could lift that much stainless wire to near vertical. As I wanted to be able to back pack this antenna, I focused on single line flowform kites which have no frame and thus pack down to a small package. They also are stable fliers and fly at quite a high angle. Sourced locally, these are very expensive kites, however Aliexpress came to the rescue with a perfectly serviceable kite around US$30.
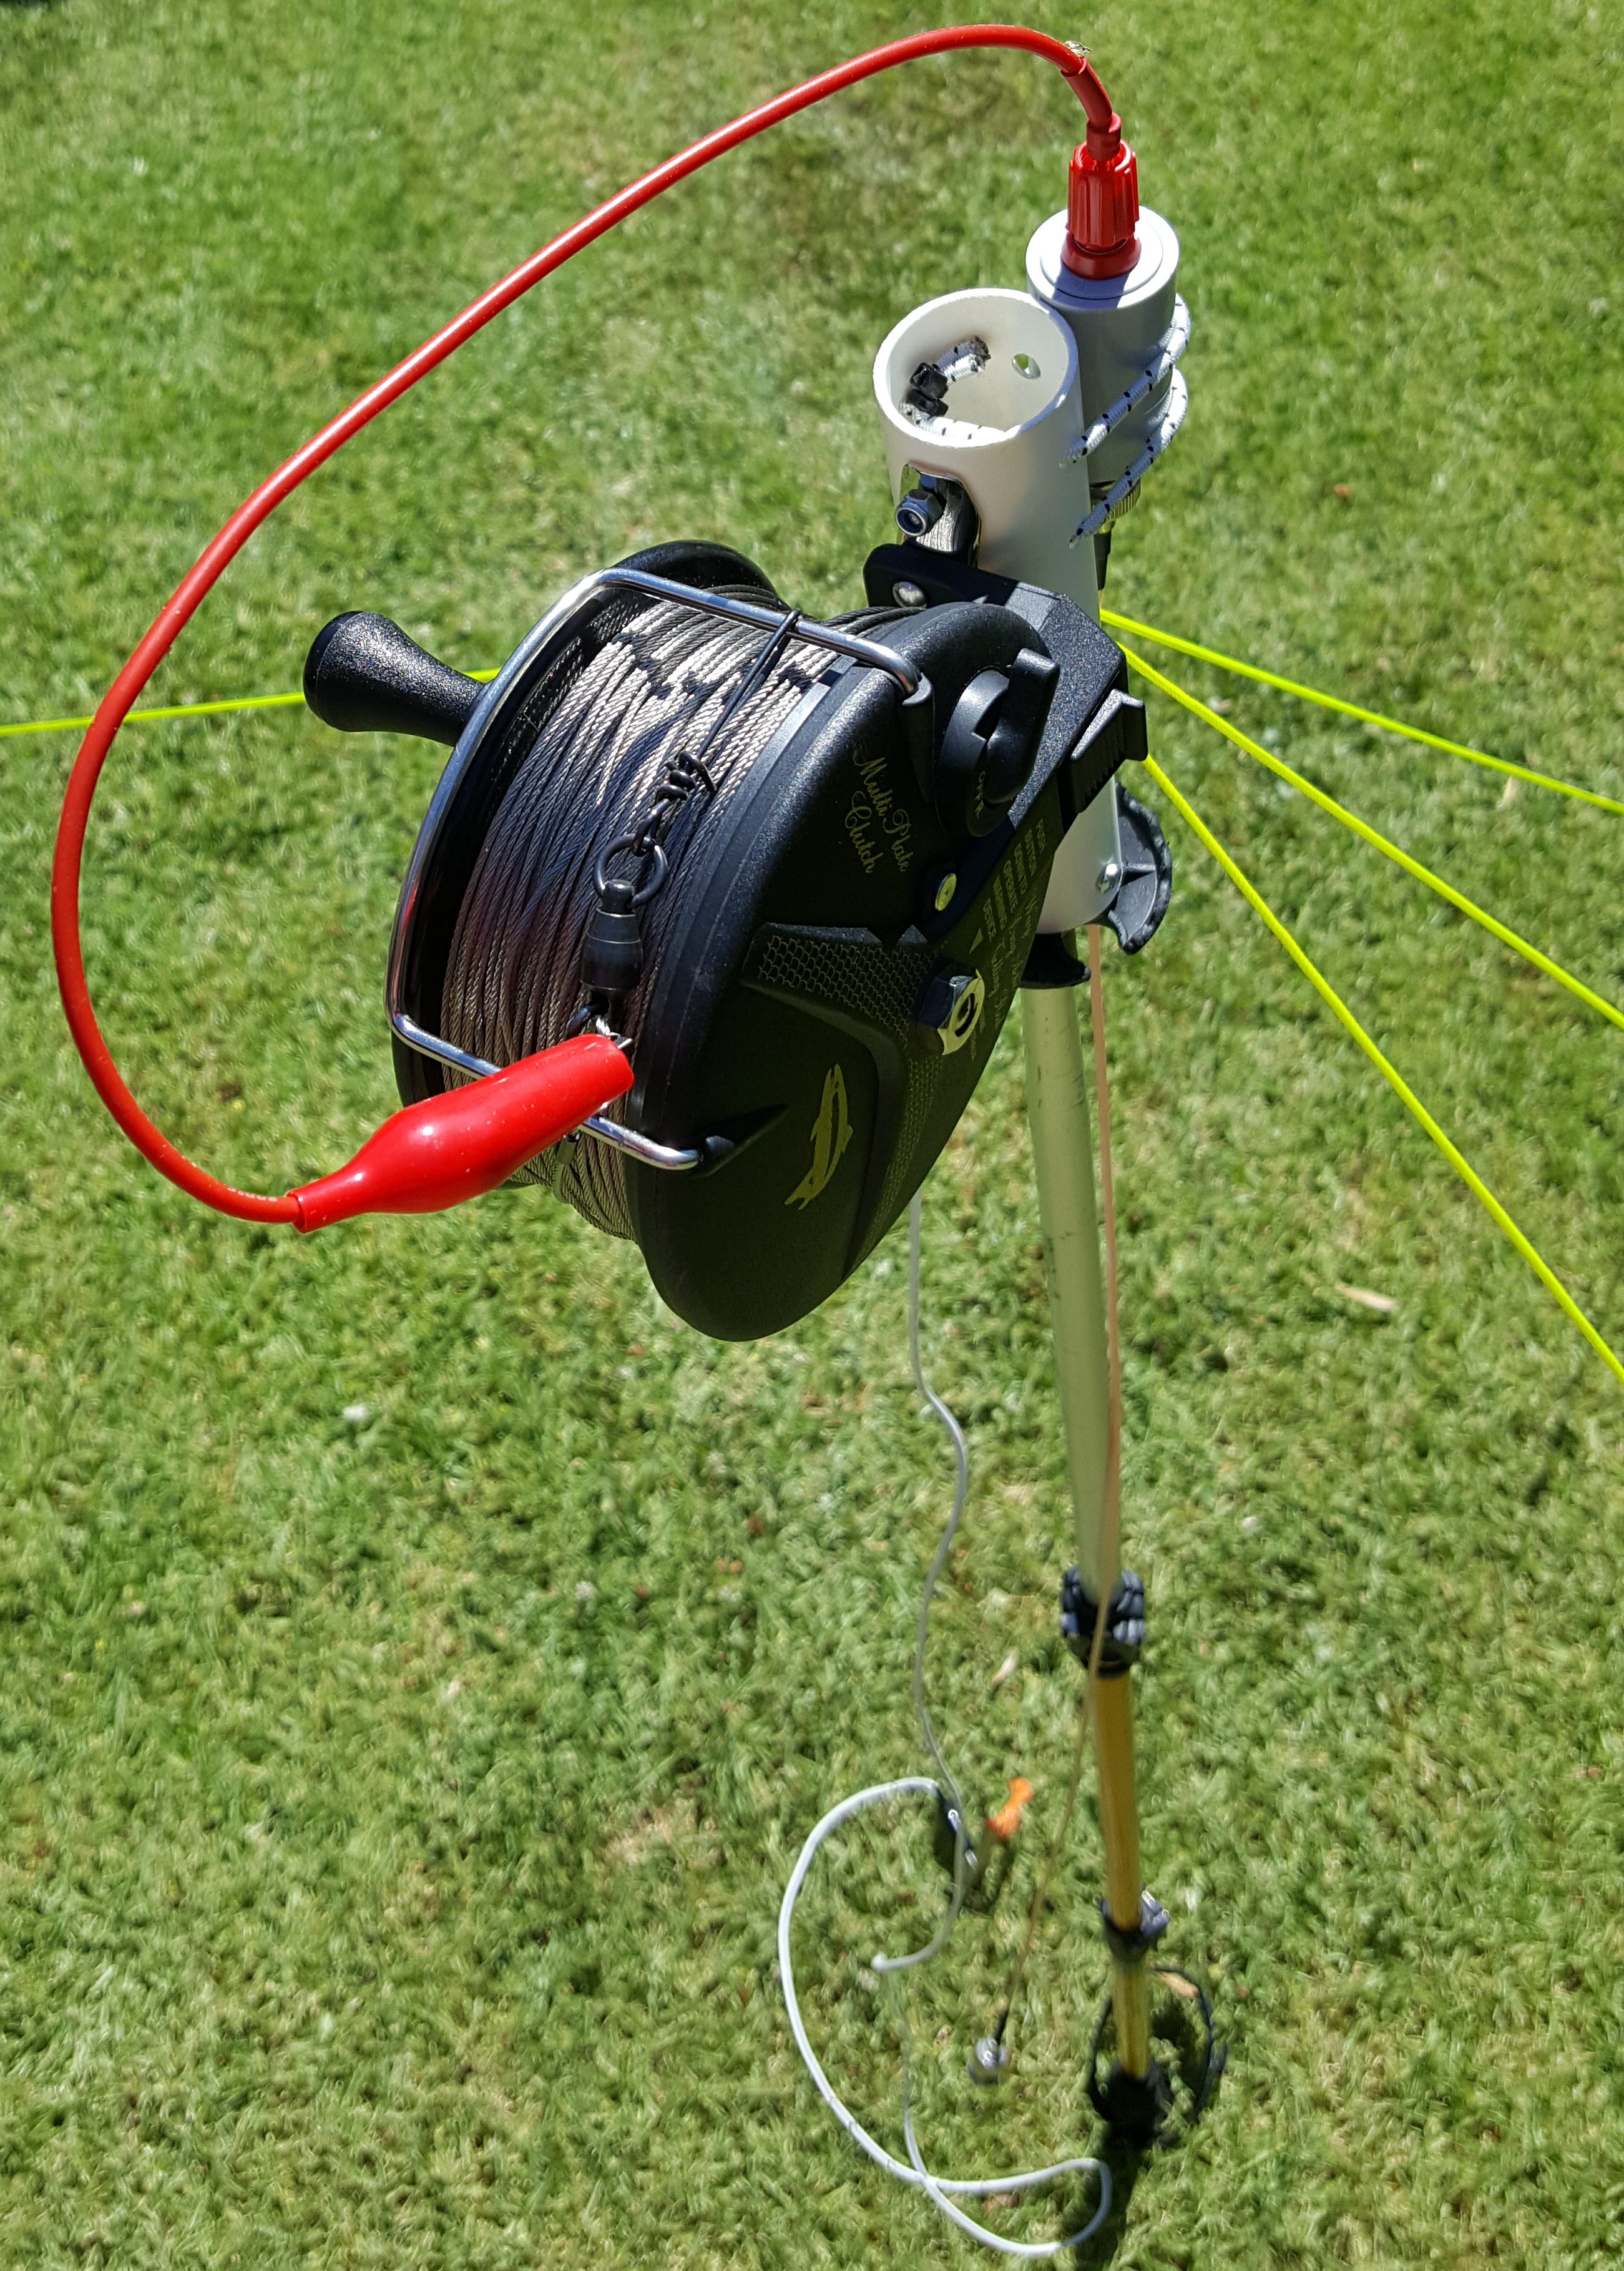
The red lead is connects to the matching unit and clips to the antenna wire
The next challenge was how to mount and anchor the reel. I chose an Alvey 456BE reel which is big enough to hold around 85m of 1.2mm stainless steel fishing trace. I always walk with hiking poles and they make a strong support pole – a great support to mount a reel on.
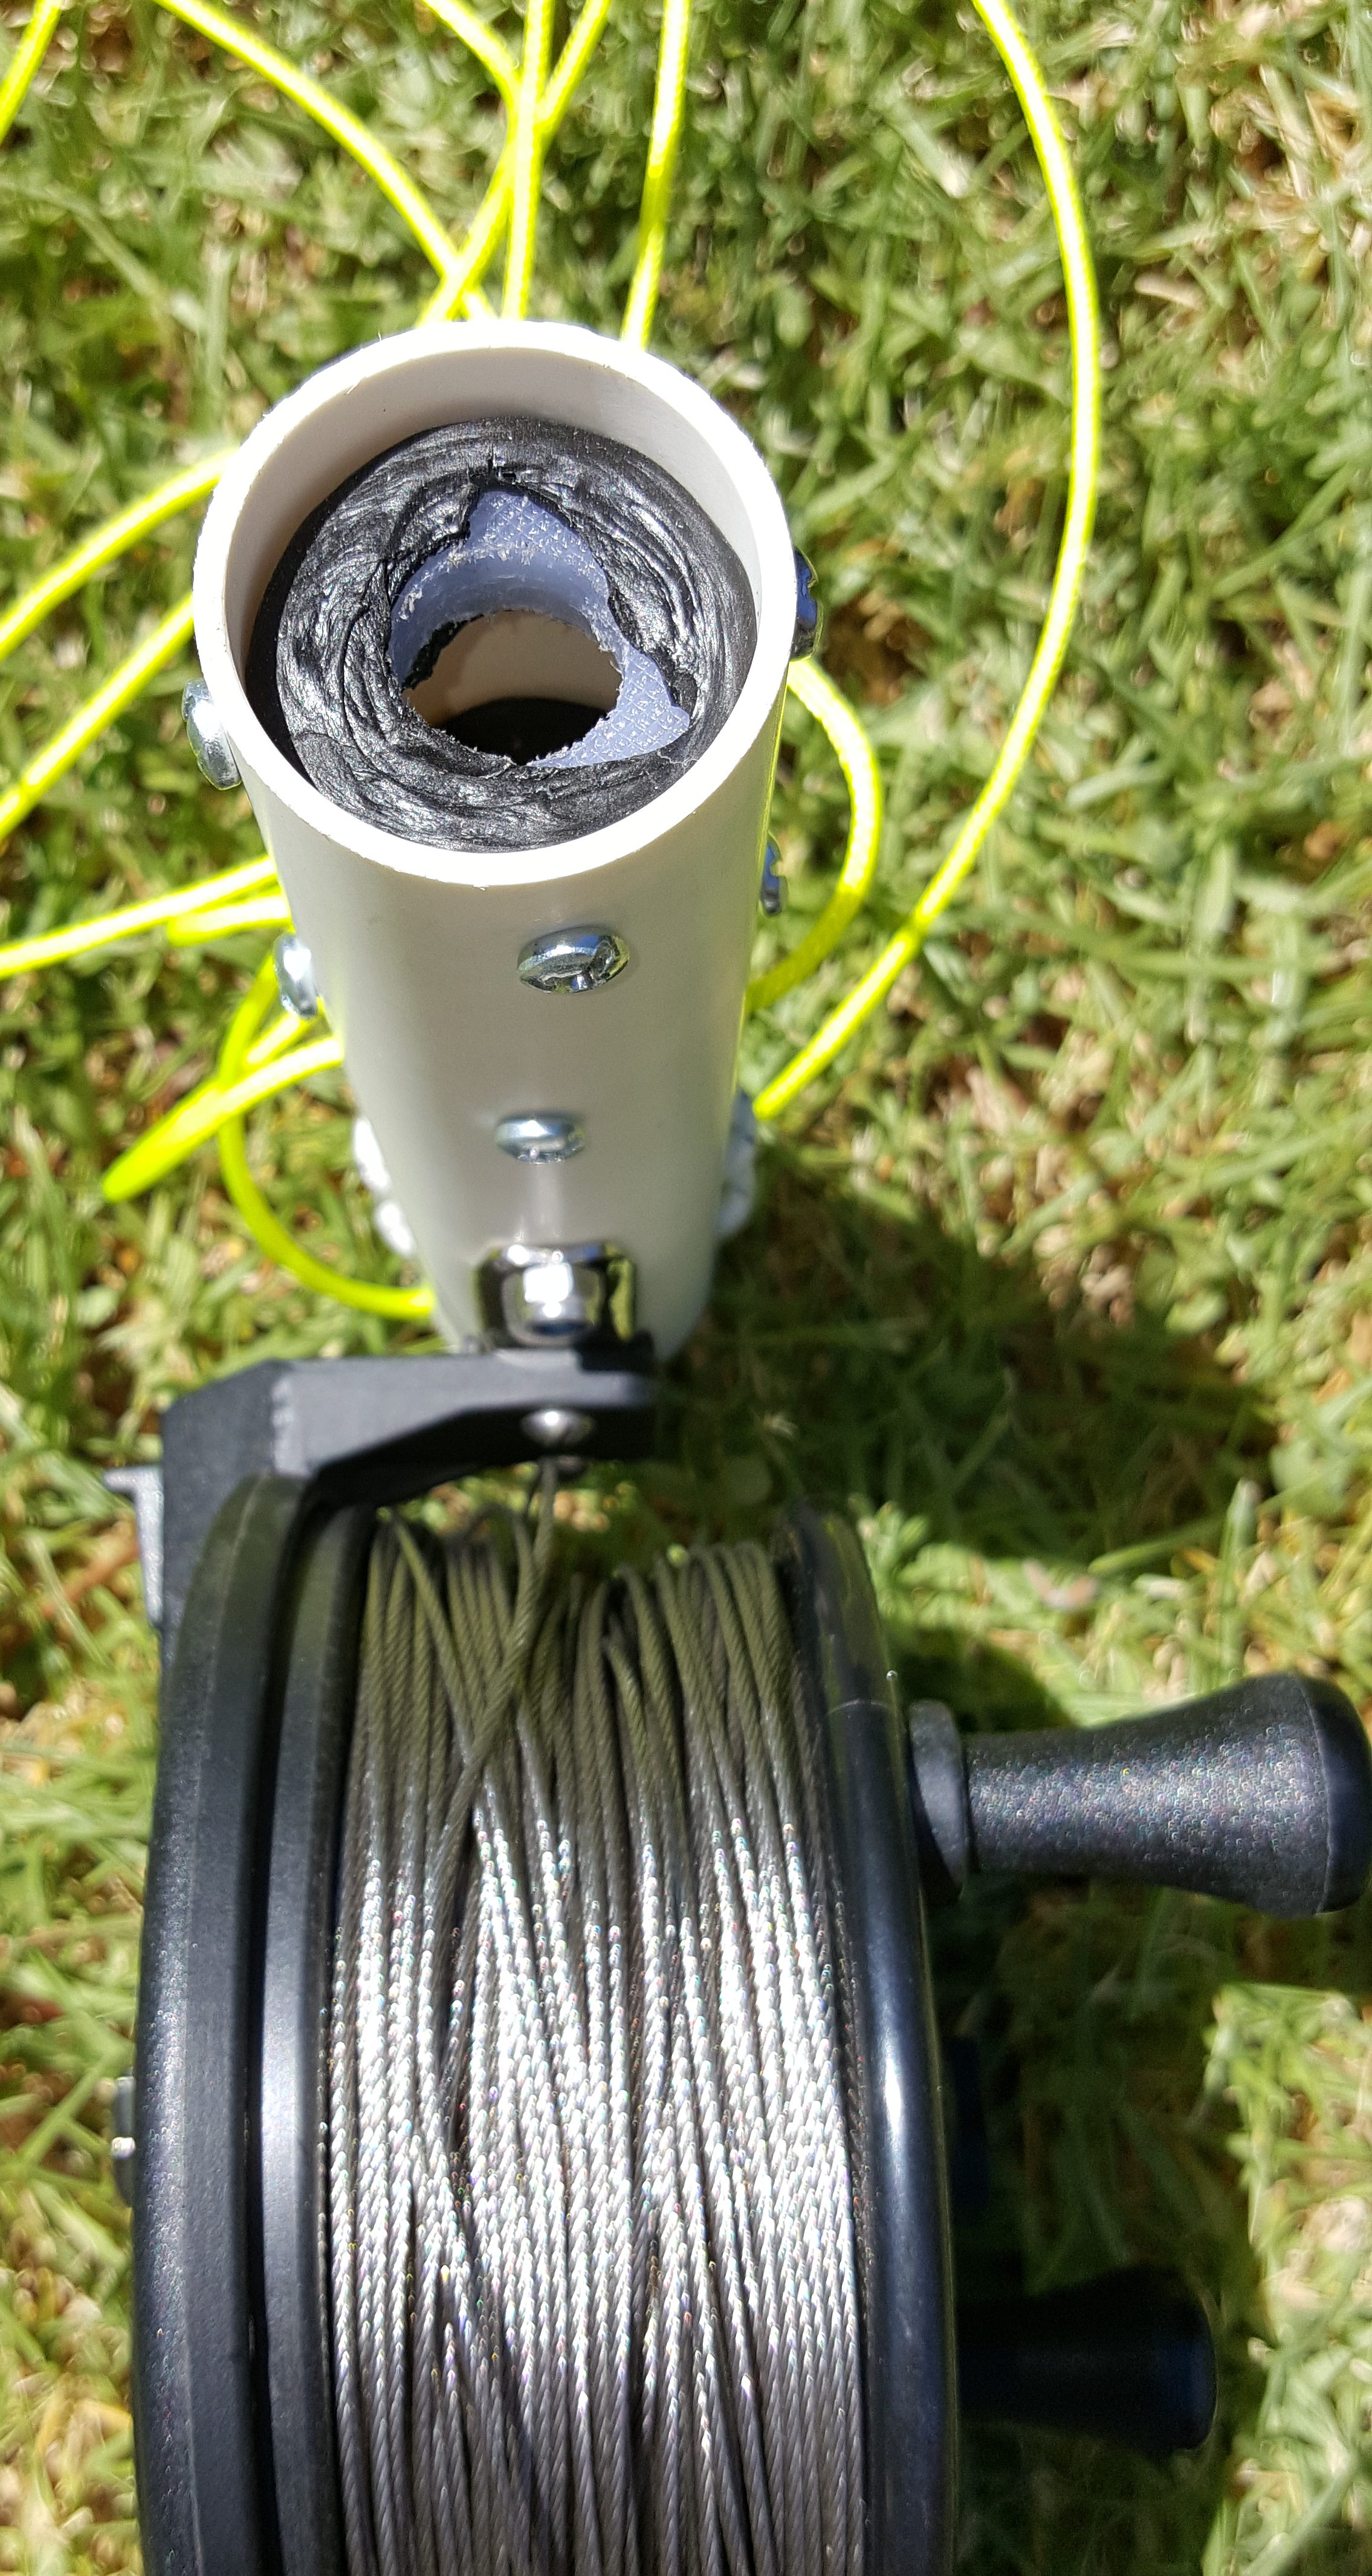
Annular rings to fir the point of a hiking pole
The reel is attached to a piece of 15mm PVC pipe which in turn is mounted to the pointed end of a hiking pole with two annular shaped pieces of kitchen chopping board held into the PVC pipe with self tapping screws (see photos).
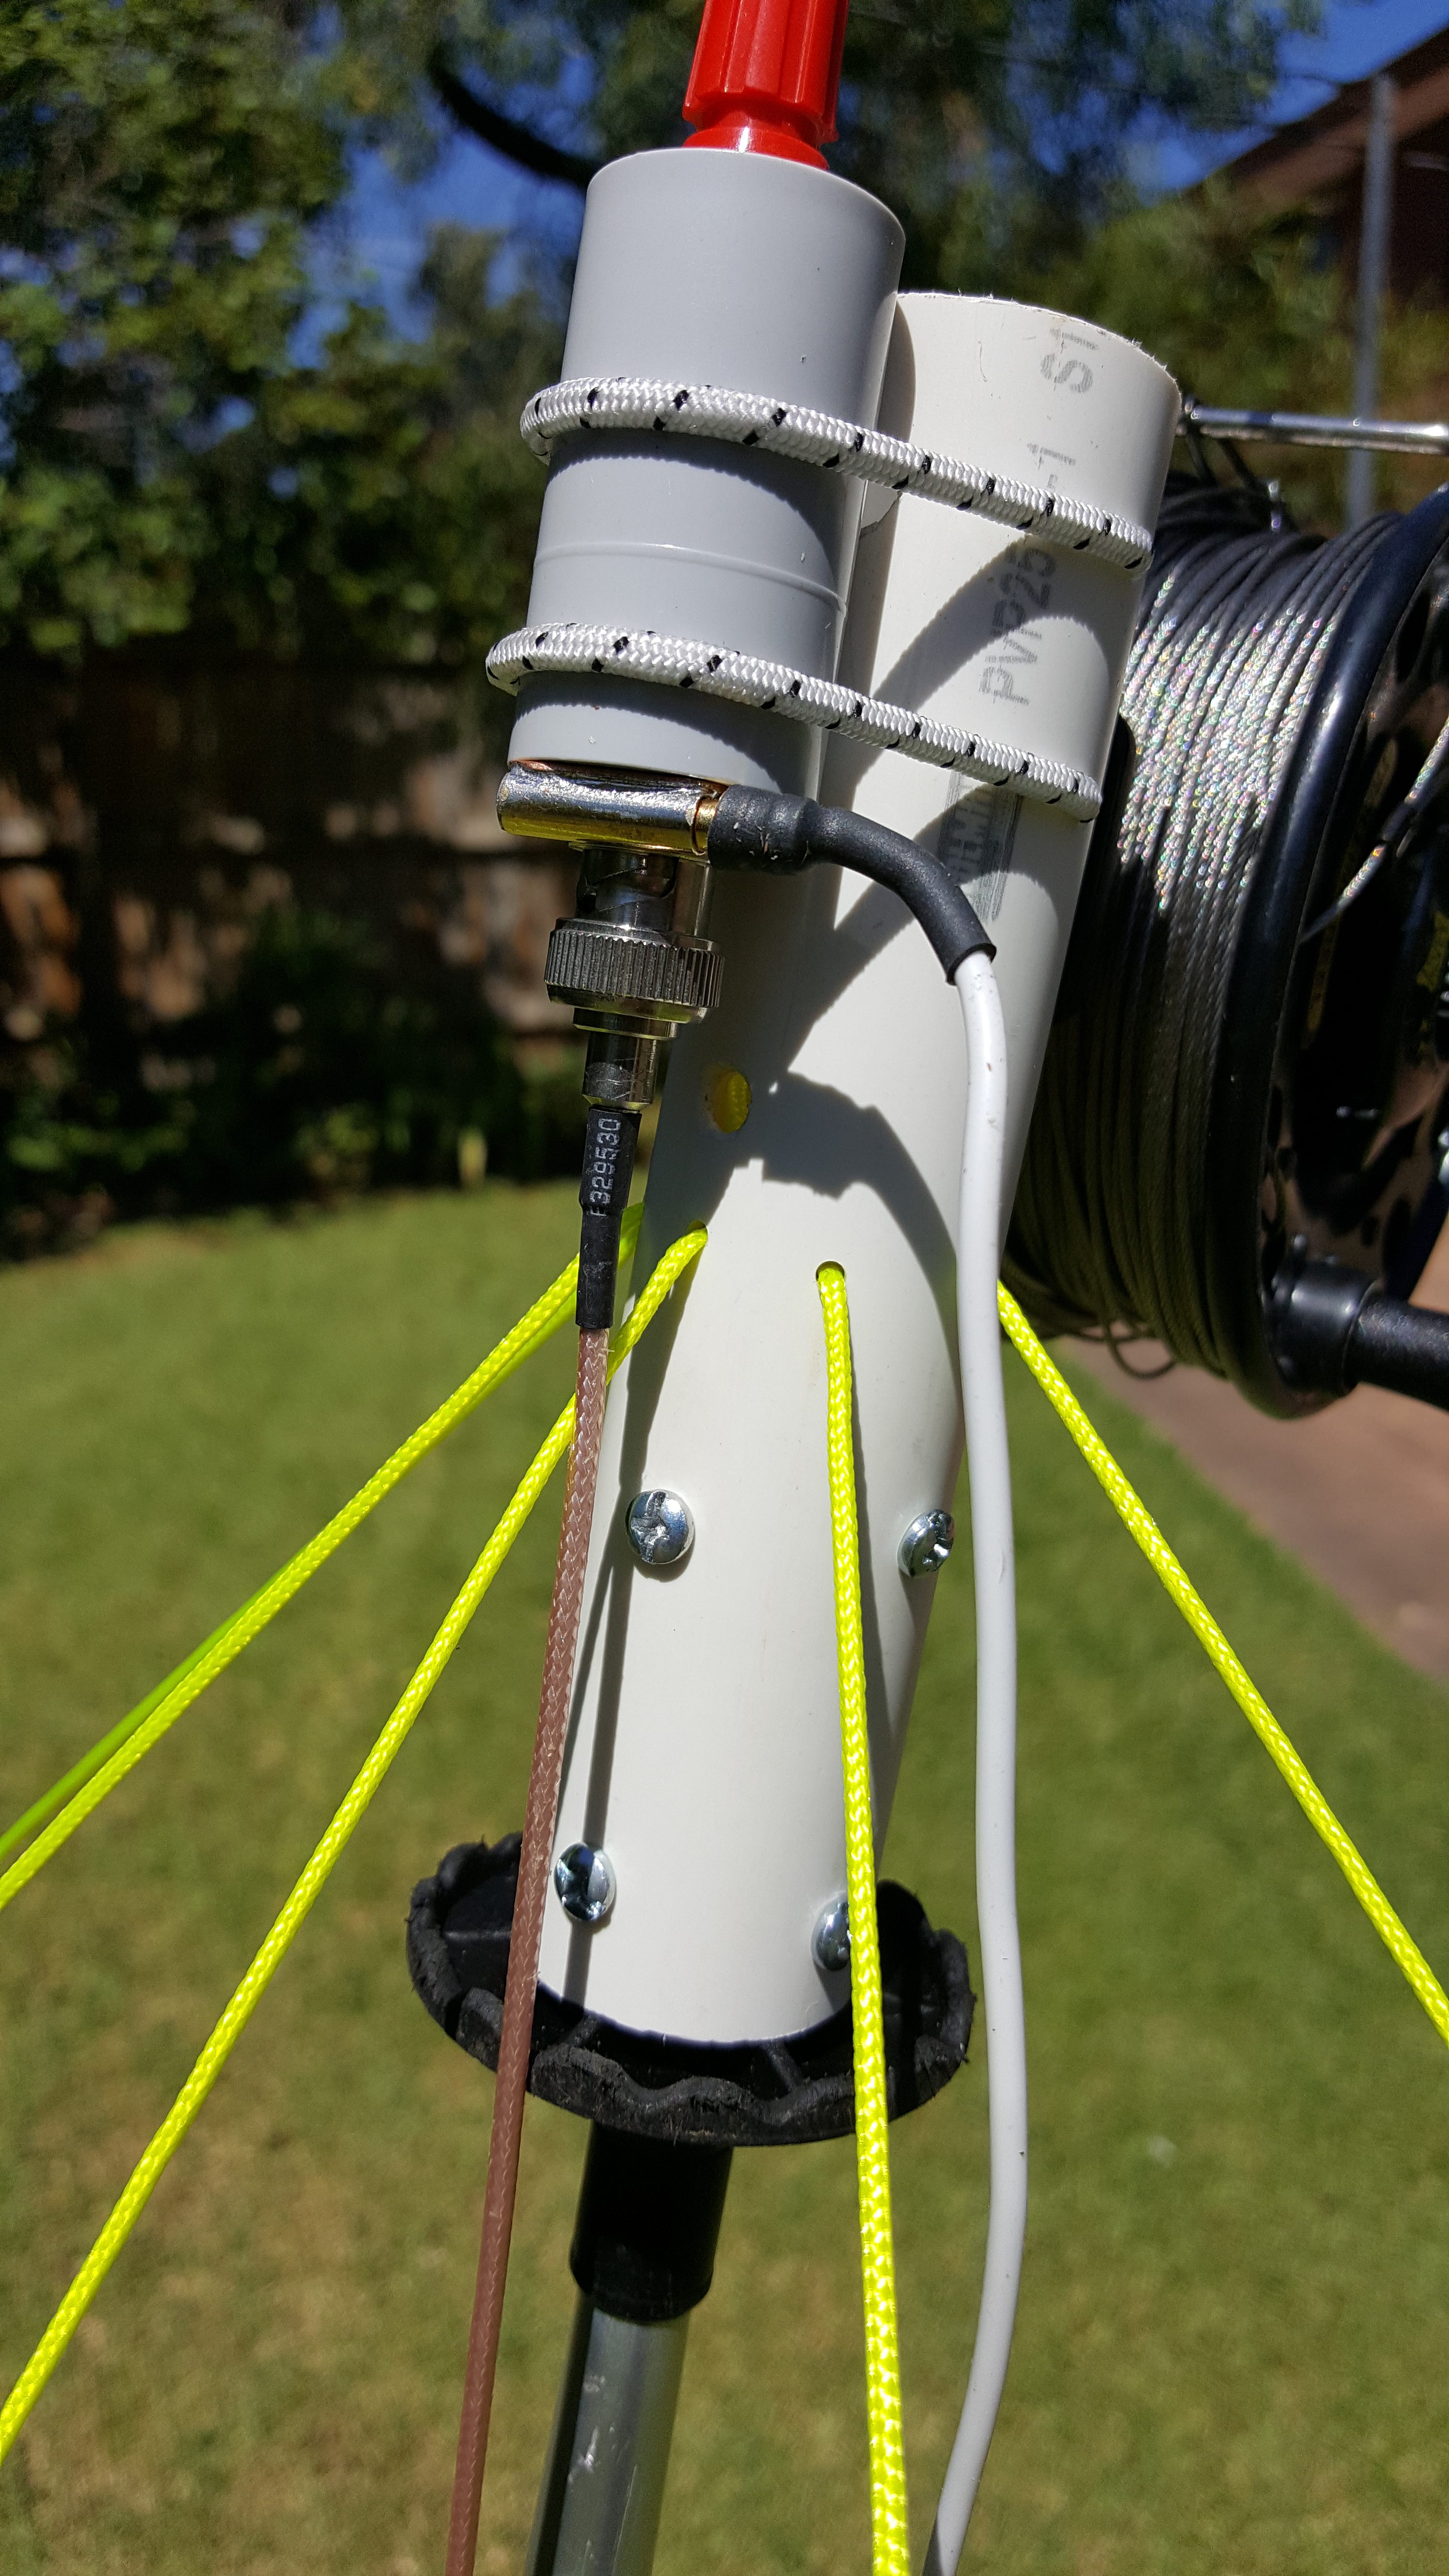
The guy lines attach to the middle of the PVC tube to keep a straight line to the kite line
A kite can pull in a number of directions, and you can’t always assume you have something suitable to tie to on a summit, so I attached 5 guy lines to the PVC pipe midpoint and these are used with light weight tent pegs to anchor the reel and hiking pole to the ground.
Connecting to the antenna line is easy with a crocodile clip that allows you to connect at any point (and thus tune the antenna length).
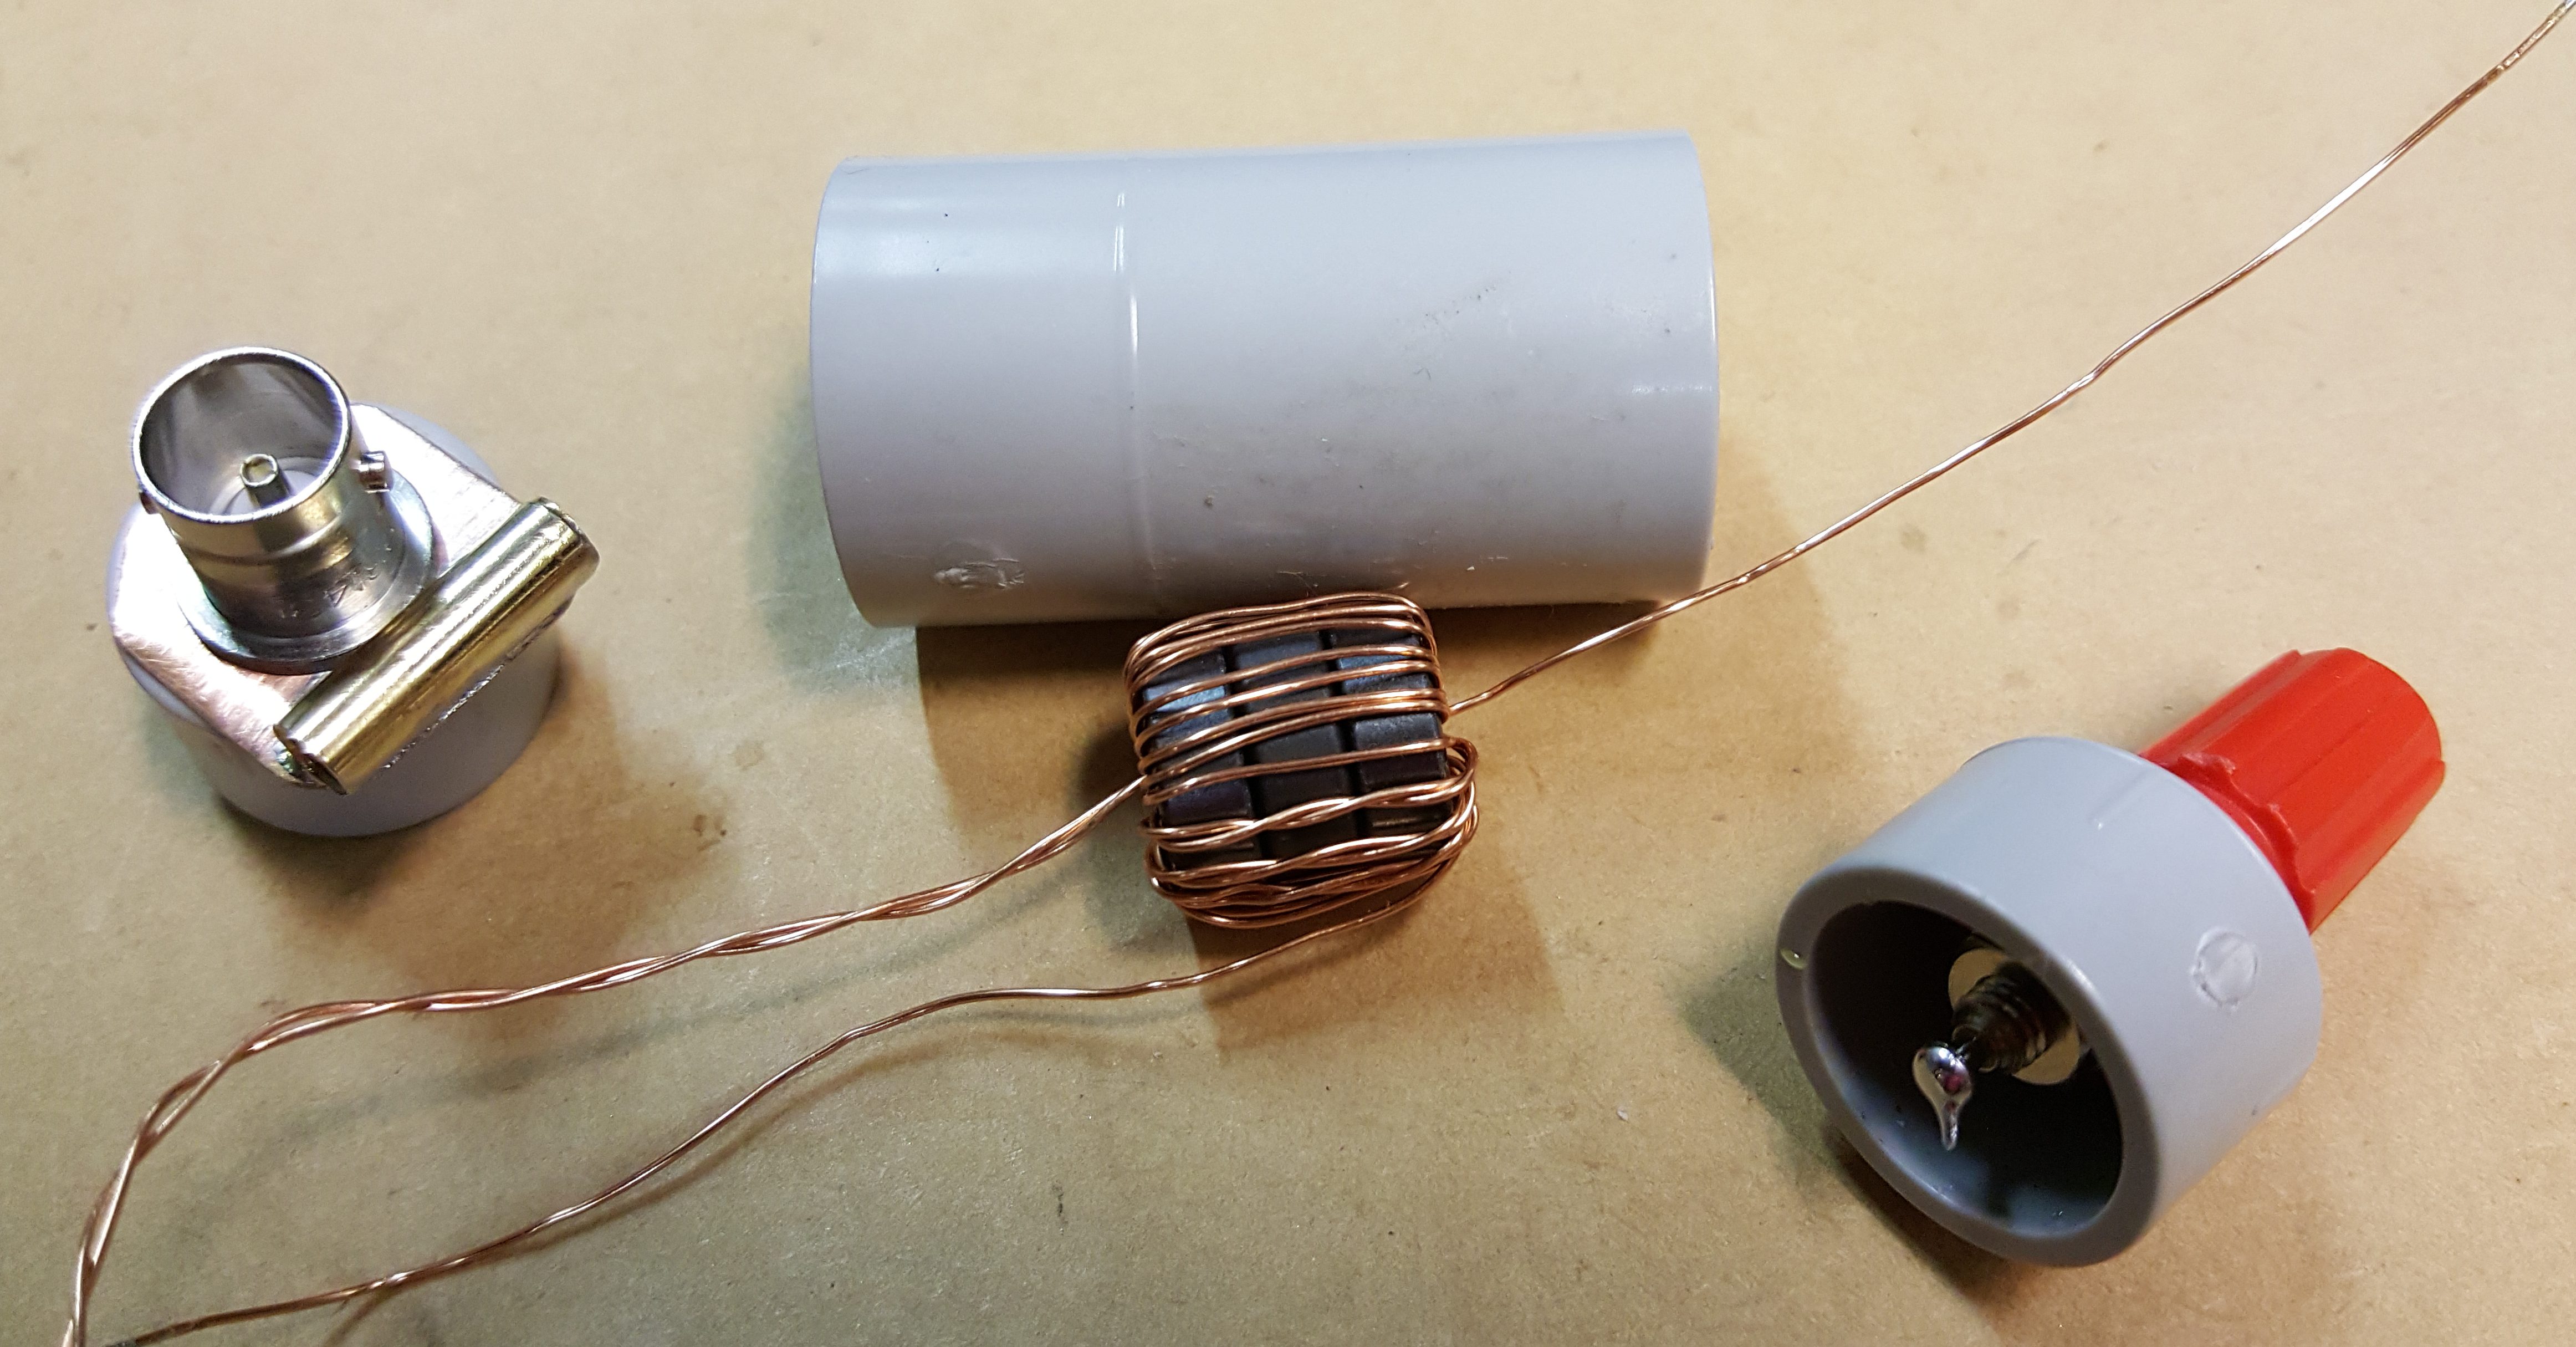
EFHW matching unit – 3 x FT50-43 with 4:32 turns
An EFHW antenna has a very high impedance at the end point and you need a matching transformer to feed power to it.
I’ve been using a 1:8 ratio transformer successfully in other EFHW antennas, so I planned the same for this one. The difference here is that the target bands are low frequency. Hence I wound this transformer as 1:8 ratio, but with 4:32 turns instead of 3:24 used on higher bands. At these low frequencies, you also don’t need a compensation capacitor across the input of the transformer. I used 3 stacked FT50-43 cores which made for a very compact transformer that I housed in a 20mm conduit joiner with end caps.
The matching transformer attaches to the PVC pipe with bungee cord.
One of the neat features of this type of EFHW coupler is that the antenna wire is DC grounded, so I simply made a ground wire to connect to another tent peg to drain the static off the kite line – 80m if wire in a stiff breeze will generate a LOT of volts that you don’t want fed into your sensitive receiver front end!
I have only tested this antenna briefly and found that it tuned up well on 160m and 80m and flies fine in 10 knot or greater winds. I need to find a good windy summit to test it further…
160m/80m loaded vertical antenna
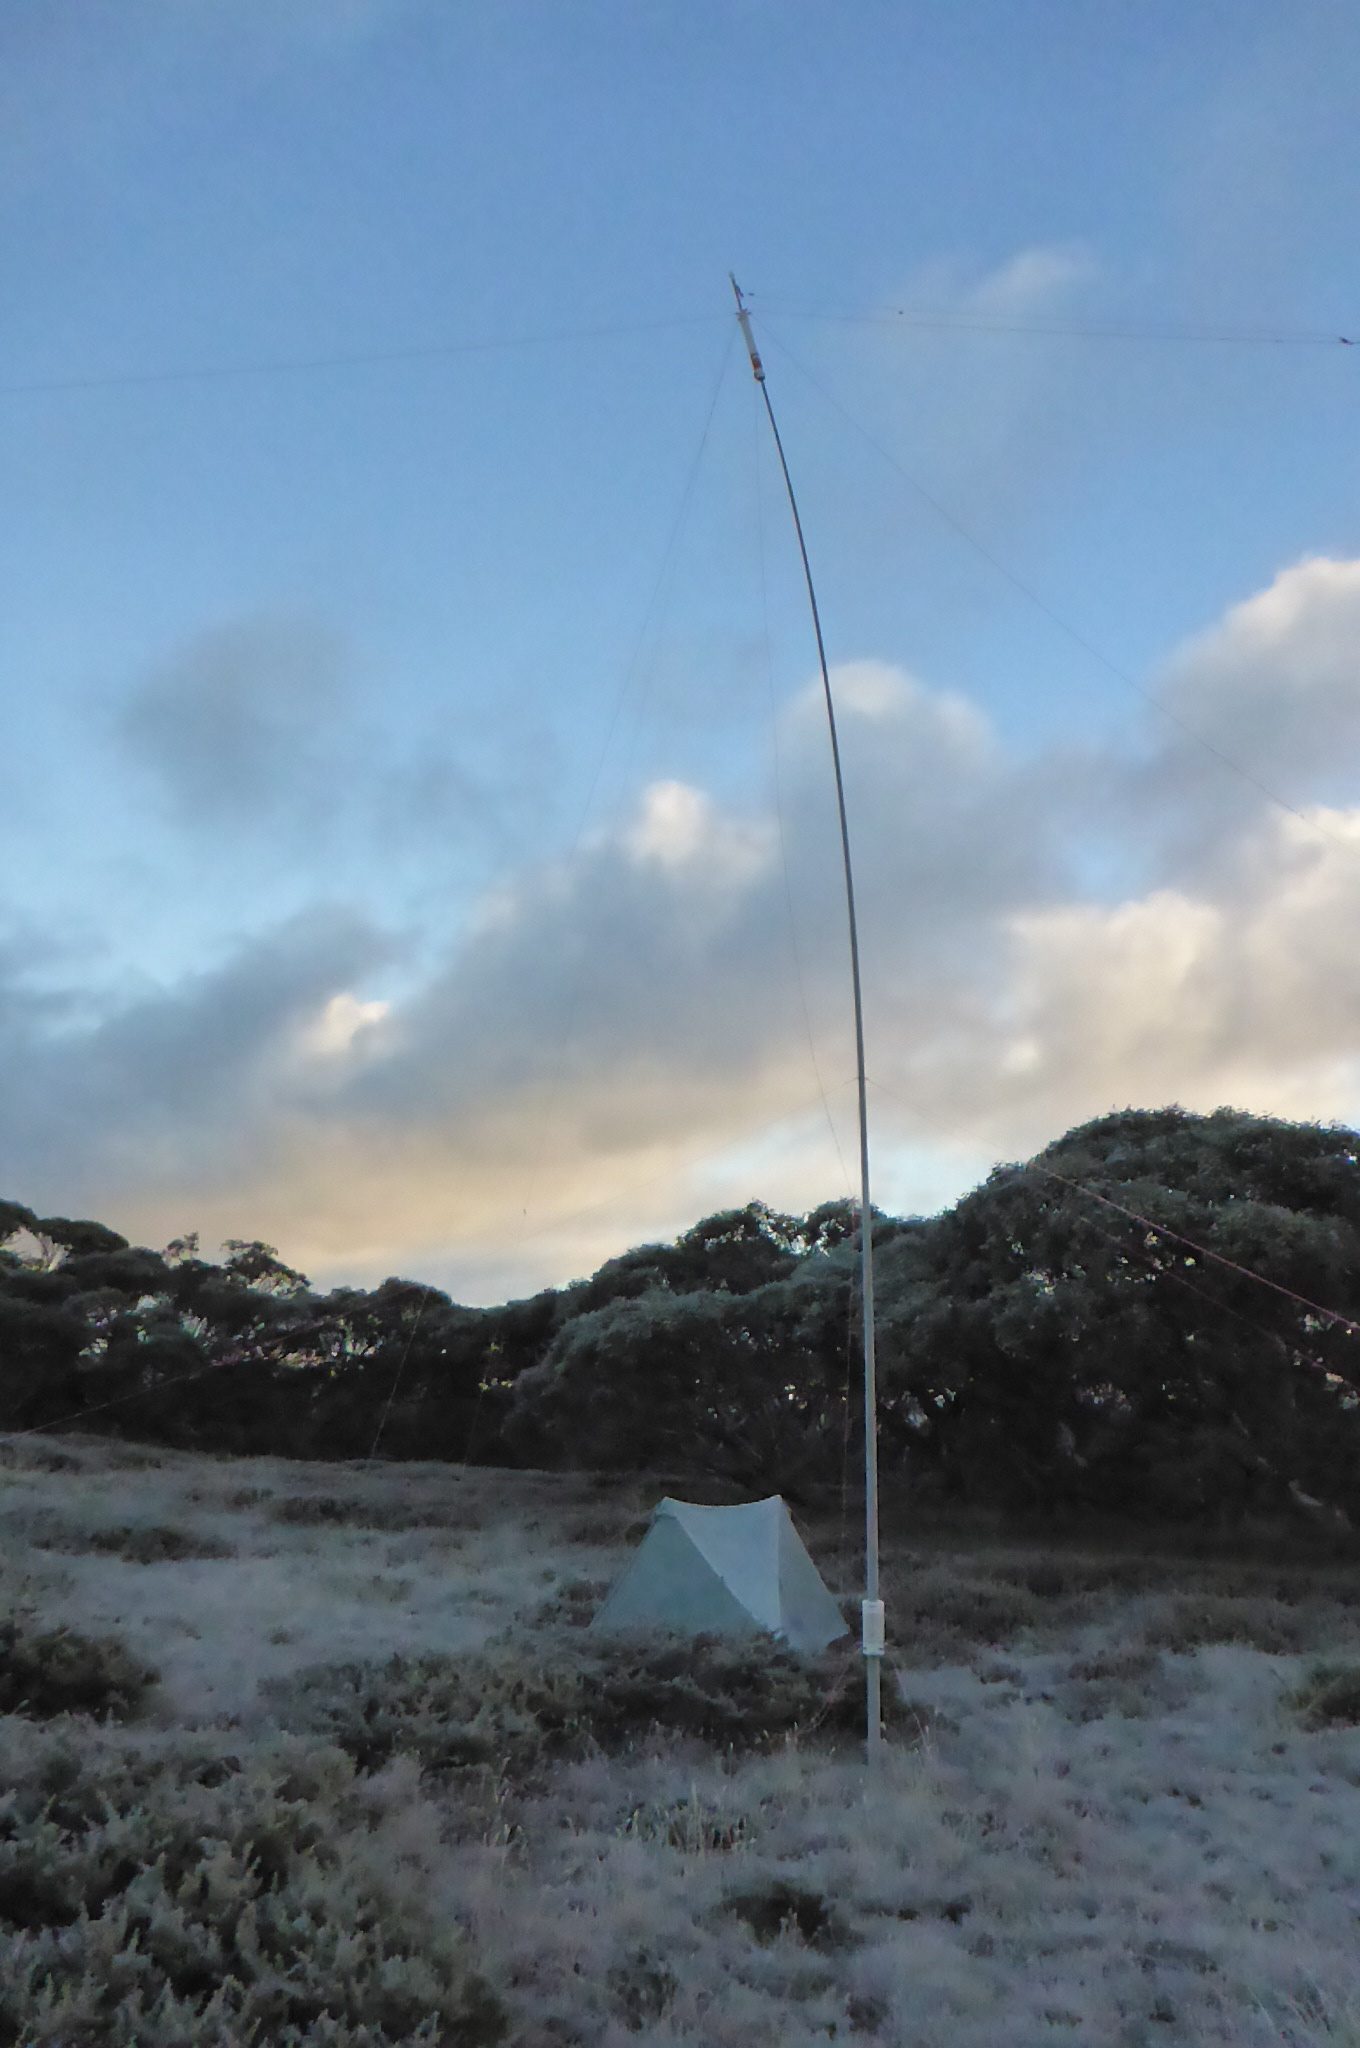
160m loaded vertical on Mt Lovicks on a very frosty morning
As I mentioned in the introduction, I needed to quickly build a 160m antenna that didn’t rely on the wind. A loaded vertical with top hat wires is an obvious option that provides a low radiation angle and manageable dimensions. It can also be relatively easily implemented on a squid pole. I took inspiration from both Peter VK3YE and Tony VK3CAT in their implementations of such an antenna.
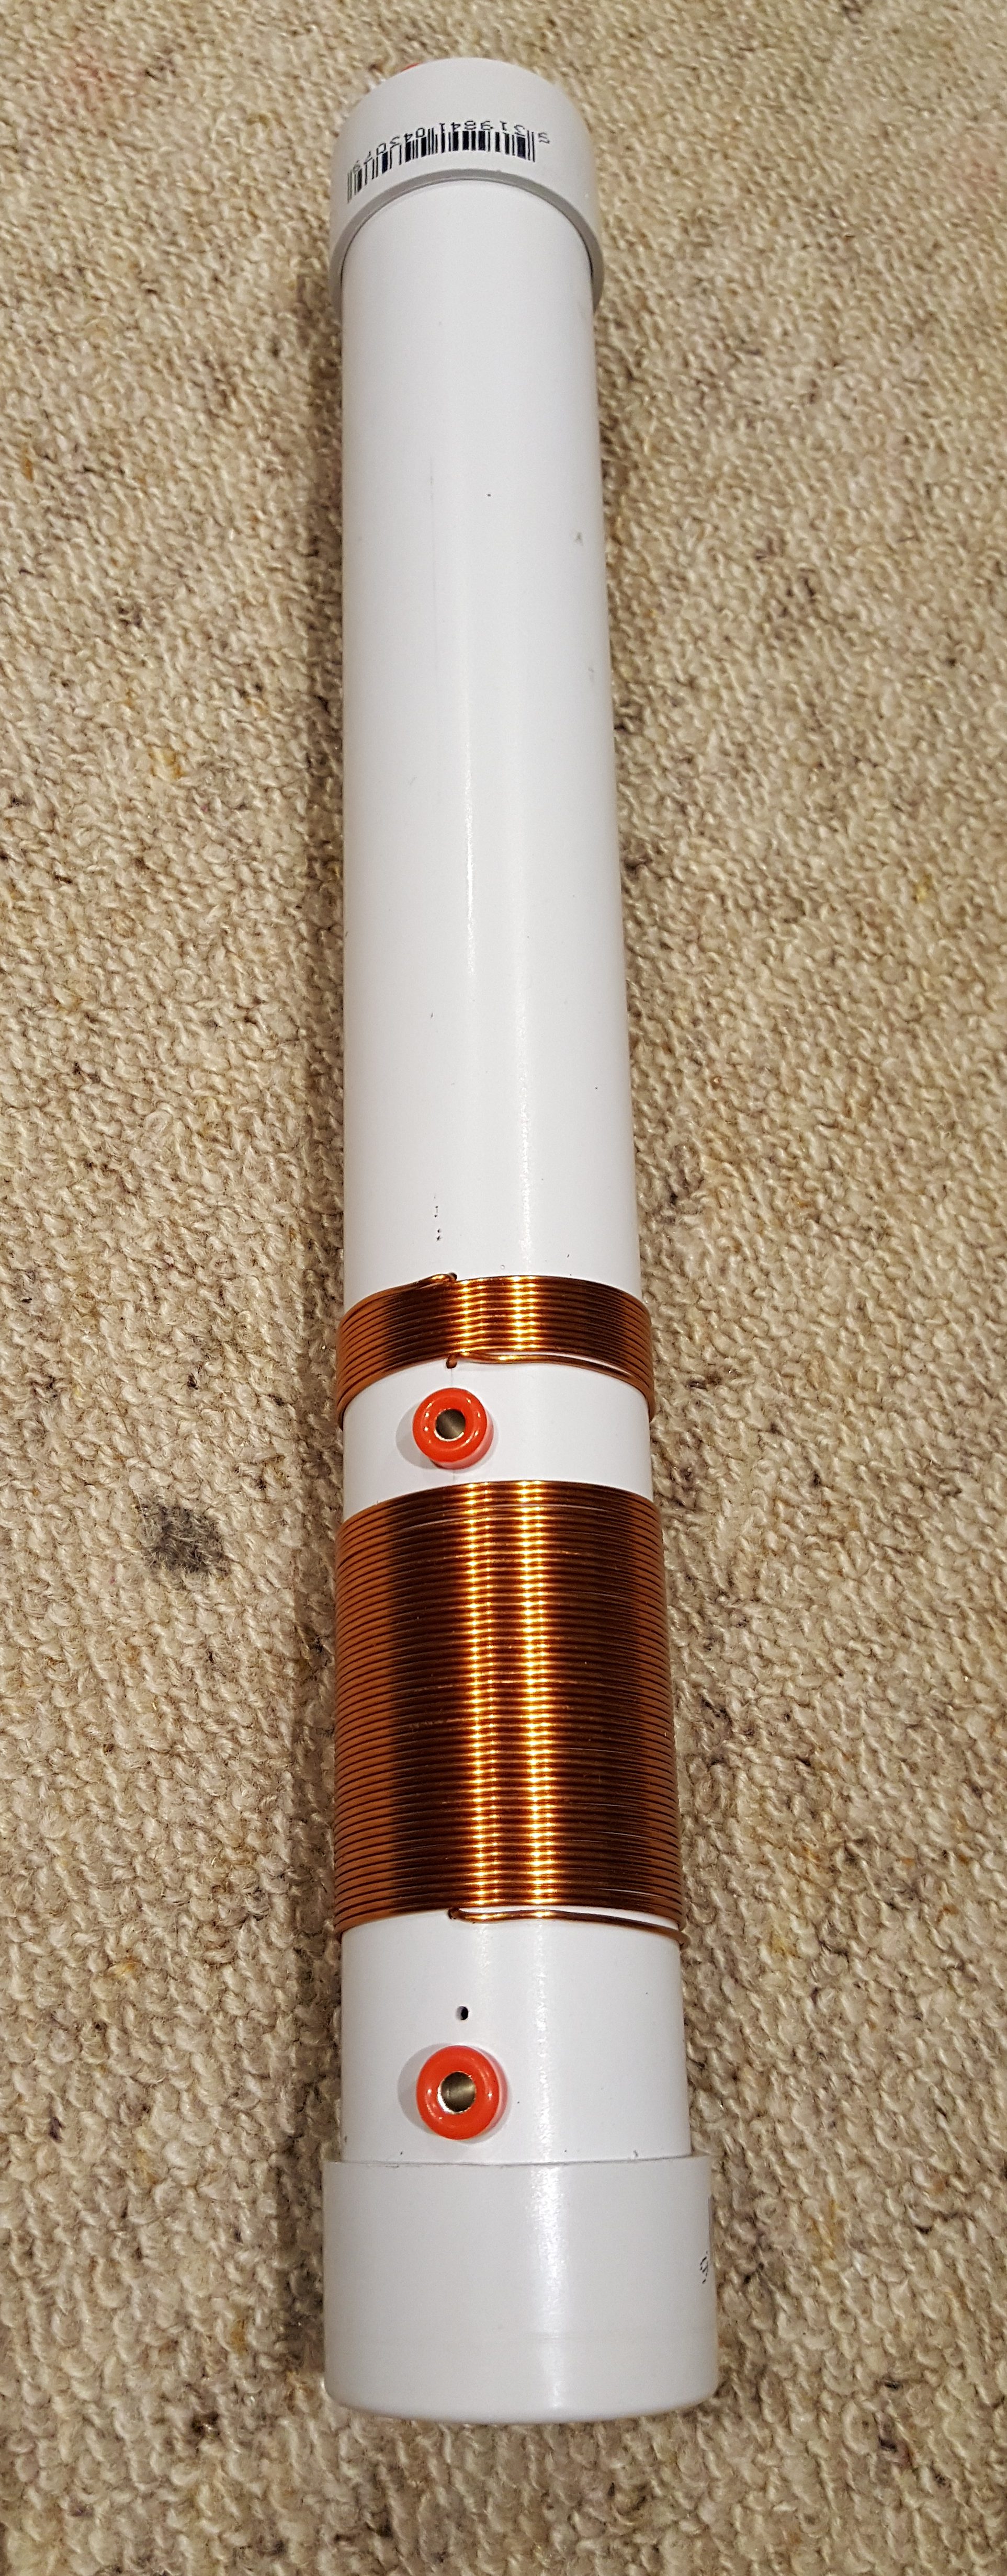
Tapped 160m and 80m loading coil
I followed Tony’s idea of using 40mm PVC to make the loading coil, but differed in the top hat arrangements and the matching coil. I modeled the antenna using 4nec2 to get the dimensions about right and the loading inductance needed for both 160m and 80m. It’s not hard to tap the loading coil to allow it to be used on both bands. Modelling indicated that at best this antenna would have about 11% radiation efficiency on 160m which is about the best that can be expected with a limited ground system and short antenna.
I used right angle banana plugs to attach the top hat wires to the loading coil and also to connect the radiator wire to the tap point on the loading coil.
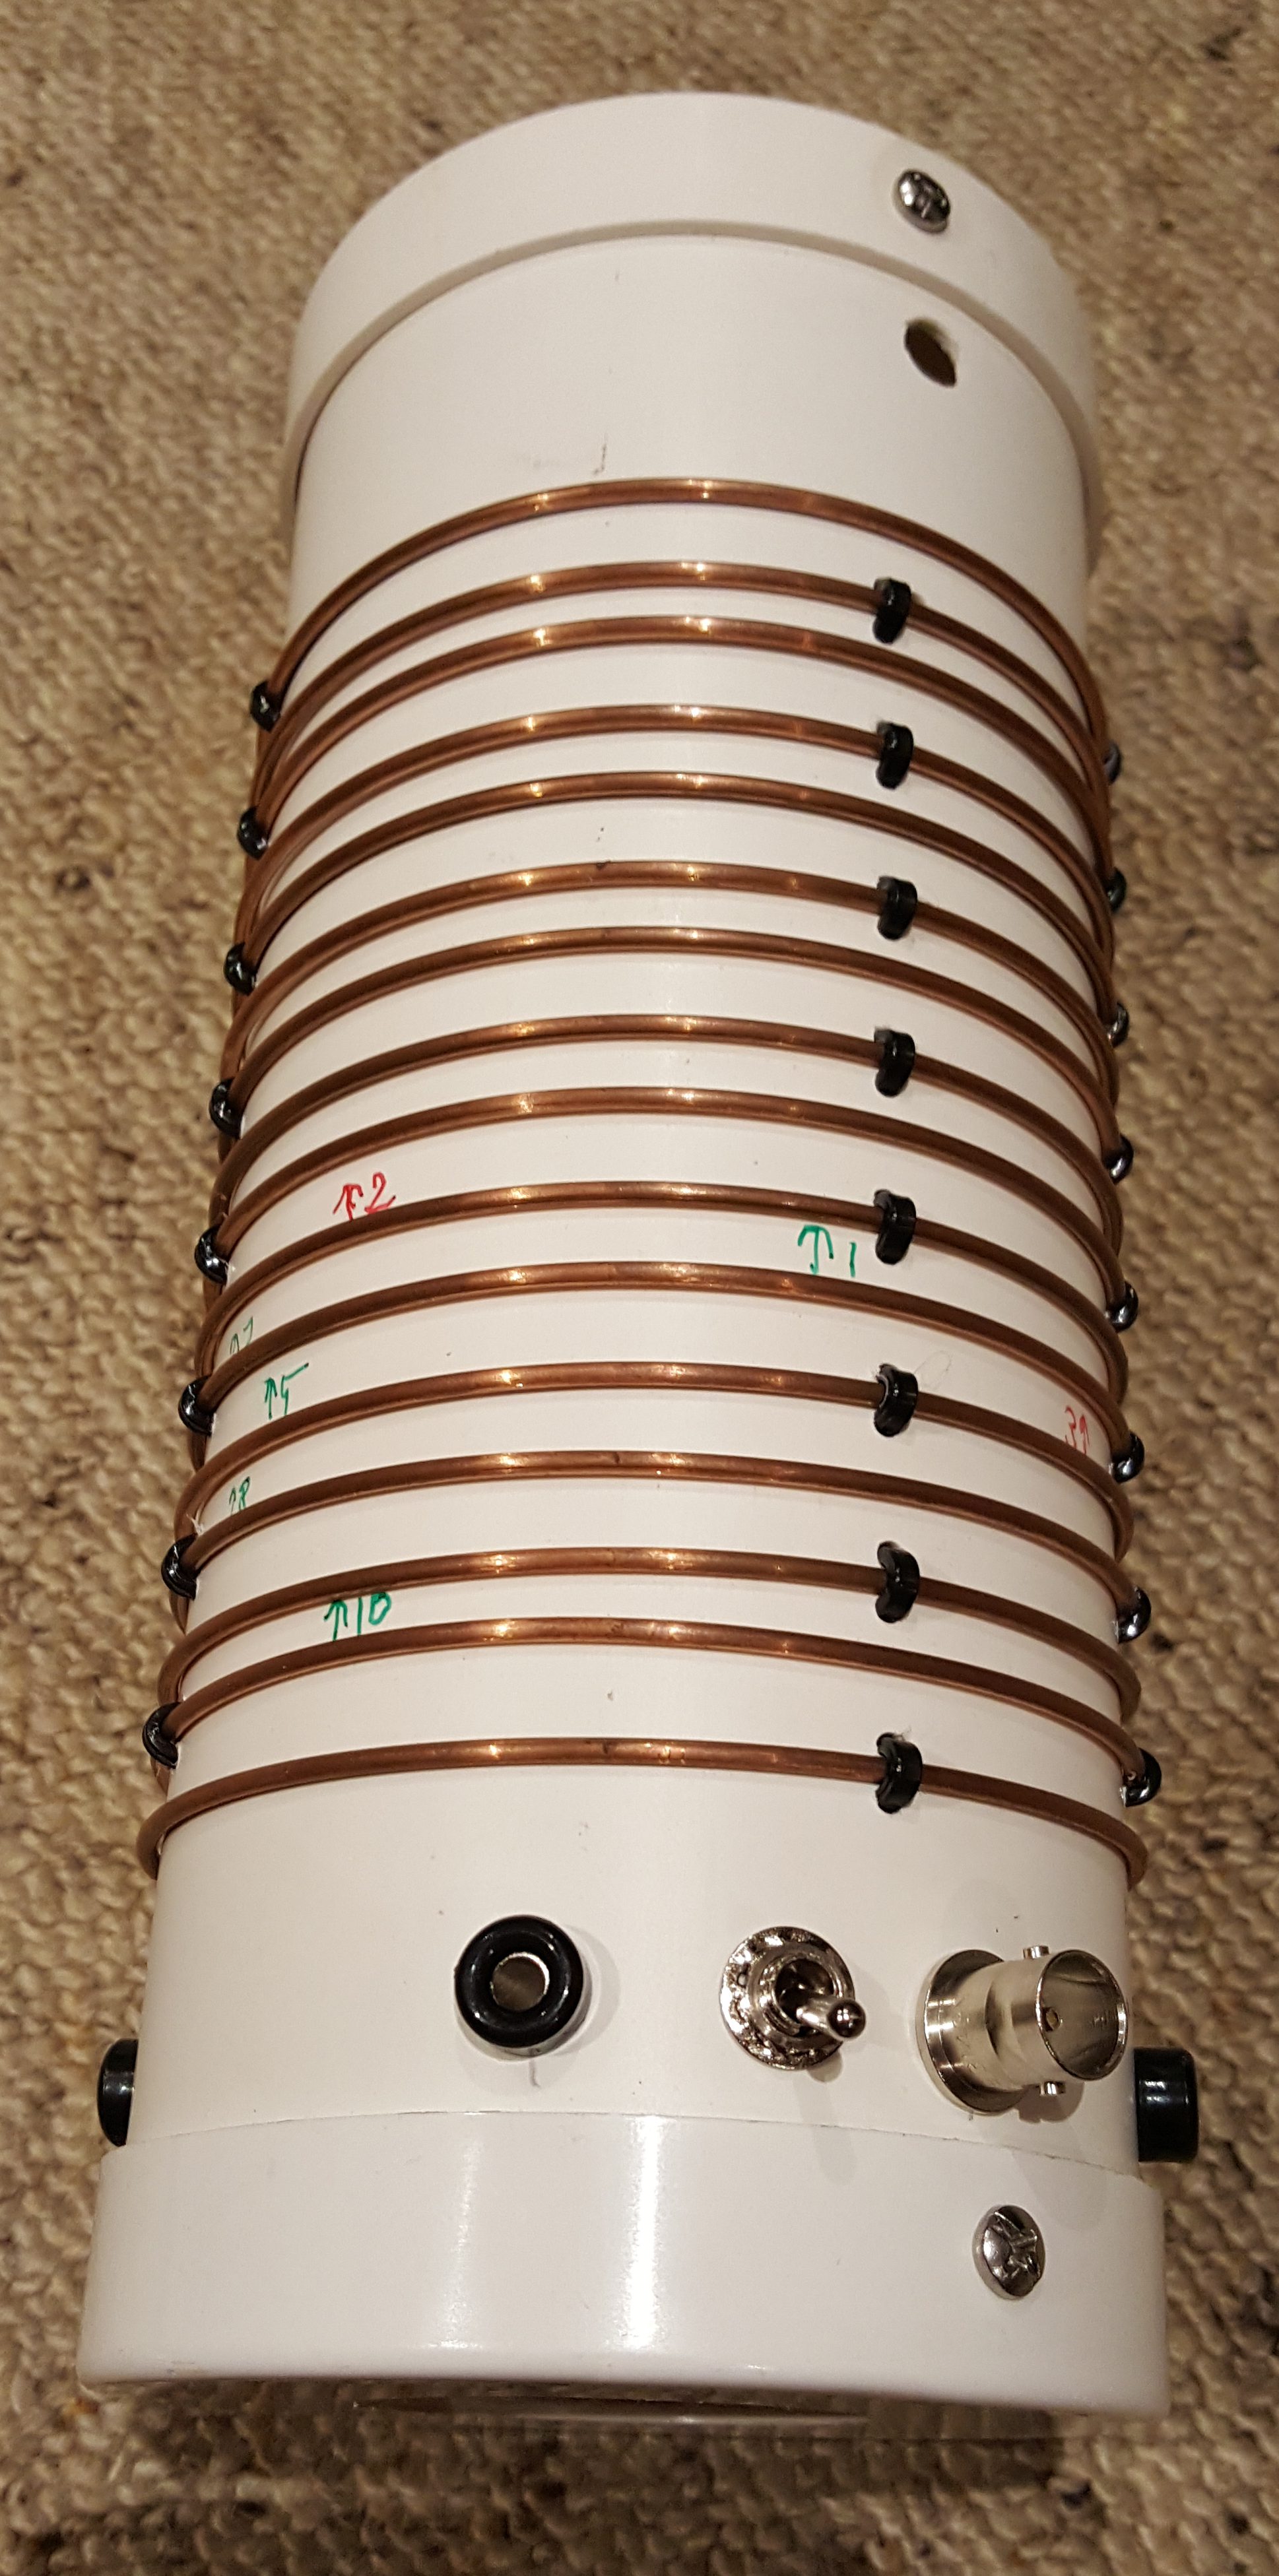
Matching unit with switch for capacitors and continuously tapped inductor
The matching unit is a simple L match with series L and a fixed capacitor across the input side. I provided for two capacitor values and a continuously tapped inductor built on a piece of 90mm PVC pipe. There are four 15m ground radials connected to the base matching unit. The construction ended up with the following values:
Loading coil inductance: 71uH (160m), 7uH (80m)
Loading coil turns: 53 + 10 turns on 40mm PVC pipe
Radiator length: 6.3m
Top hat wire length: 3.98m (4 wires)
Ground radial length: 15m (4 wires)
Matching coil: 11.4 uH (16 turns of 2mm bare copper wire on a 90mm PVC pipe spread over 130mm length)
Matching capacitors: 430pF silver mica and 1000pF silver mica
Static bleed resistor: 390k across the input
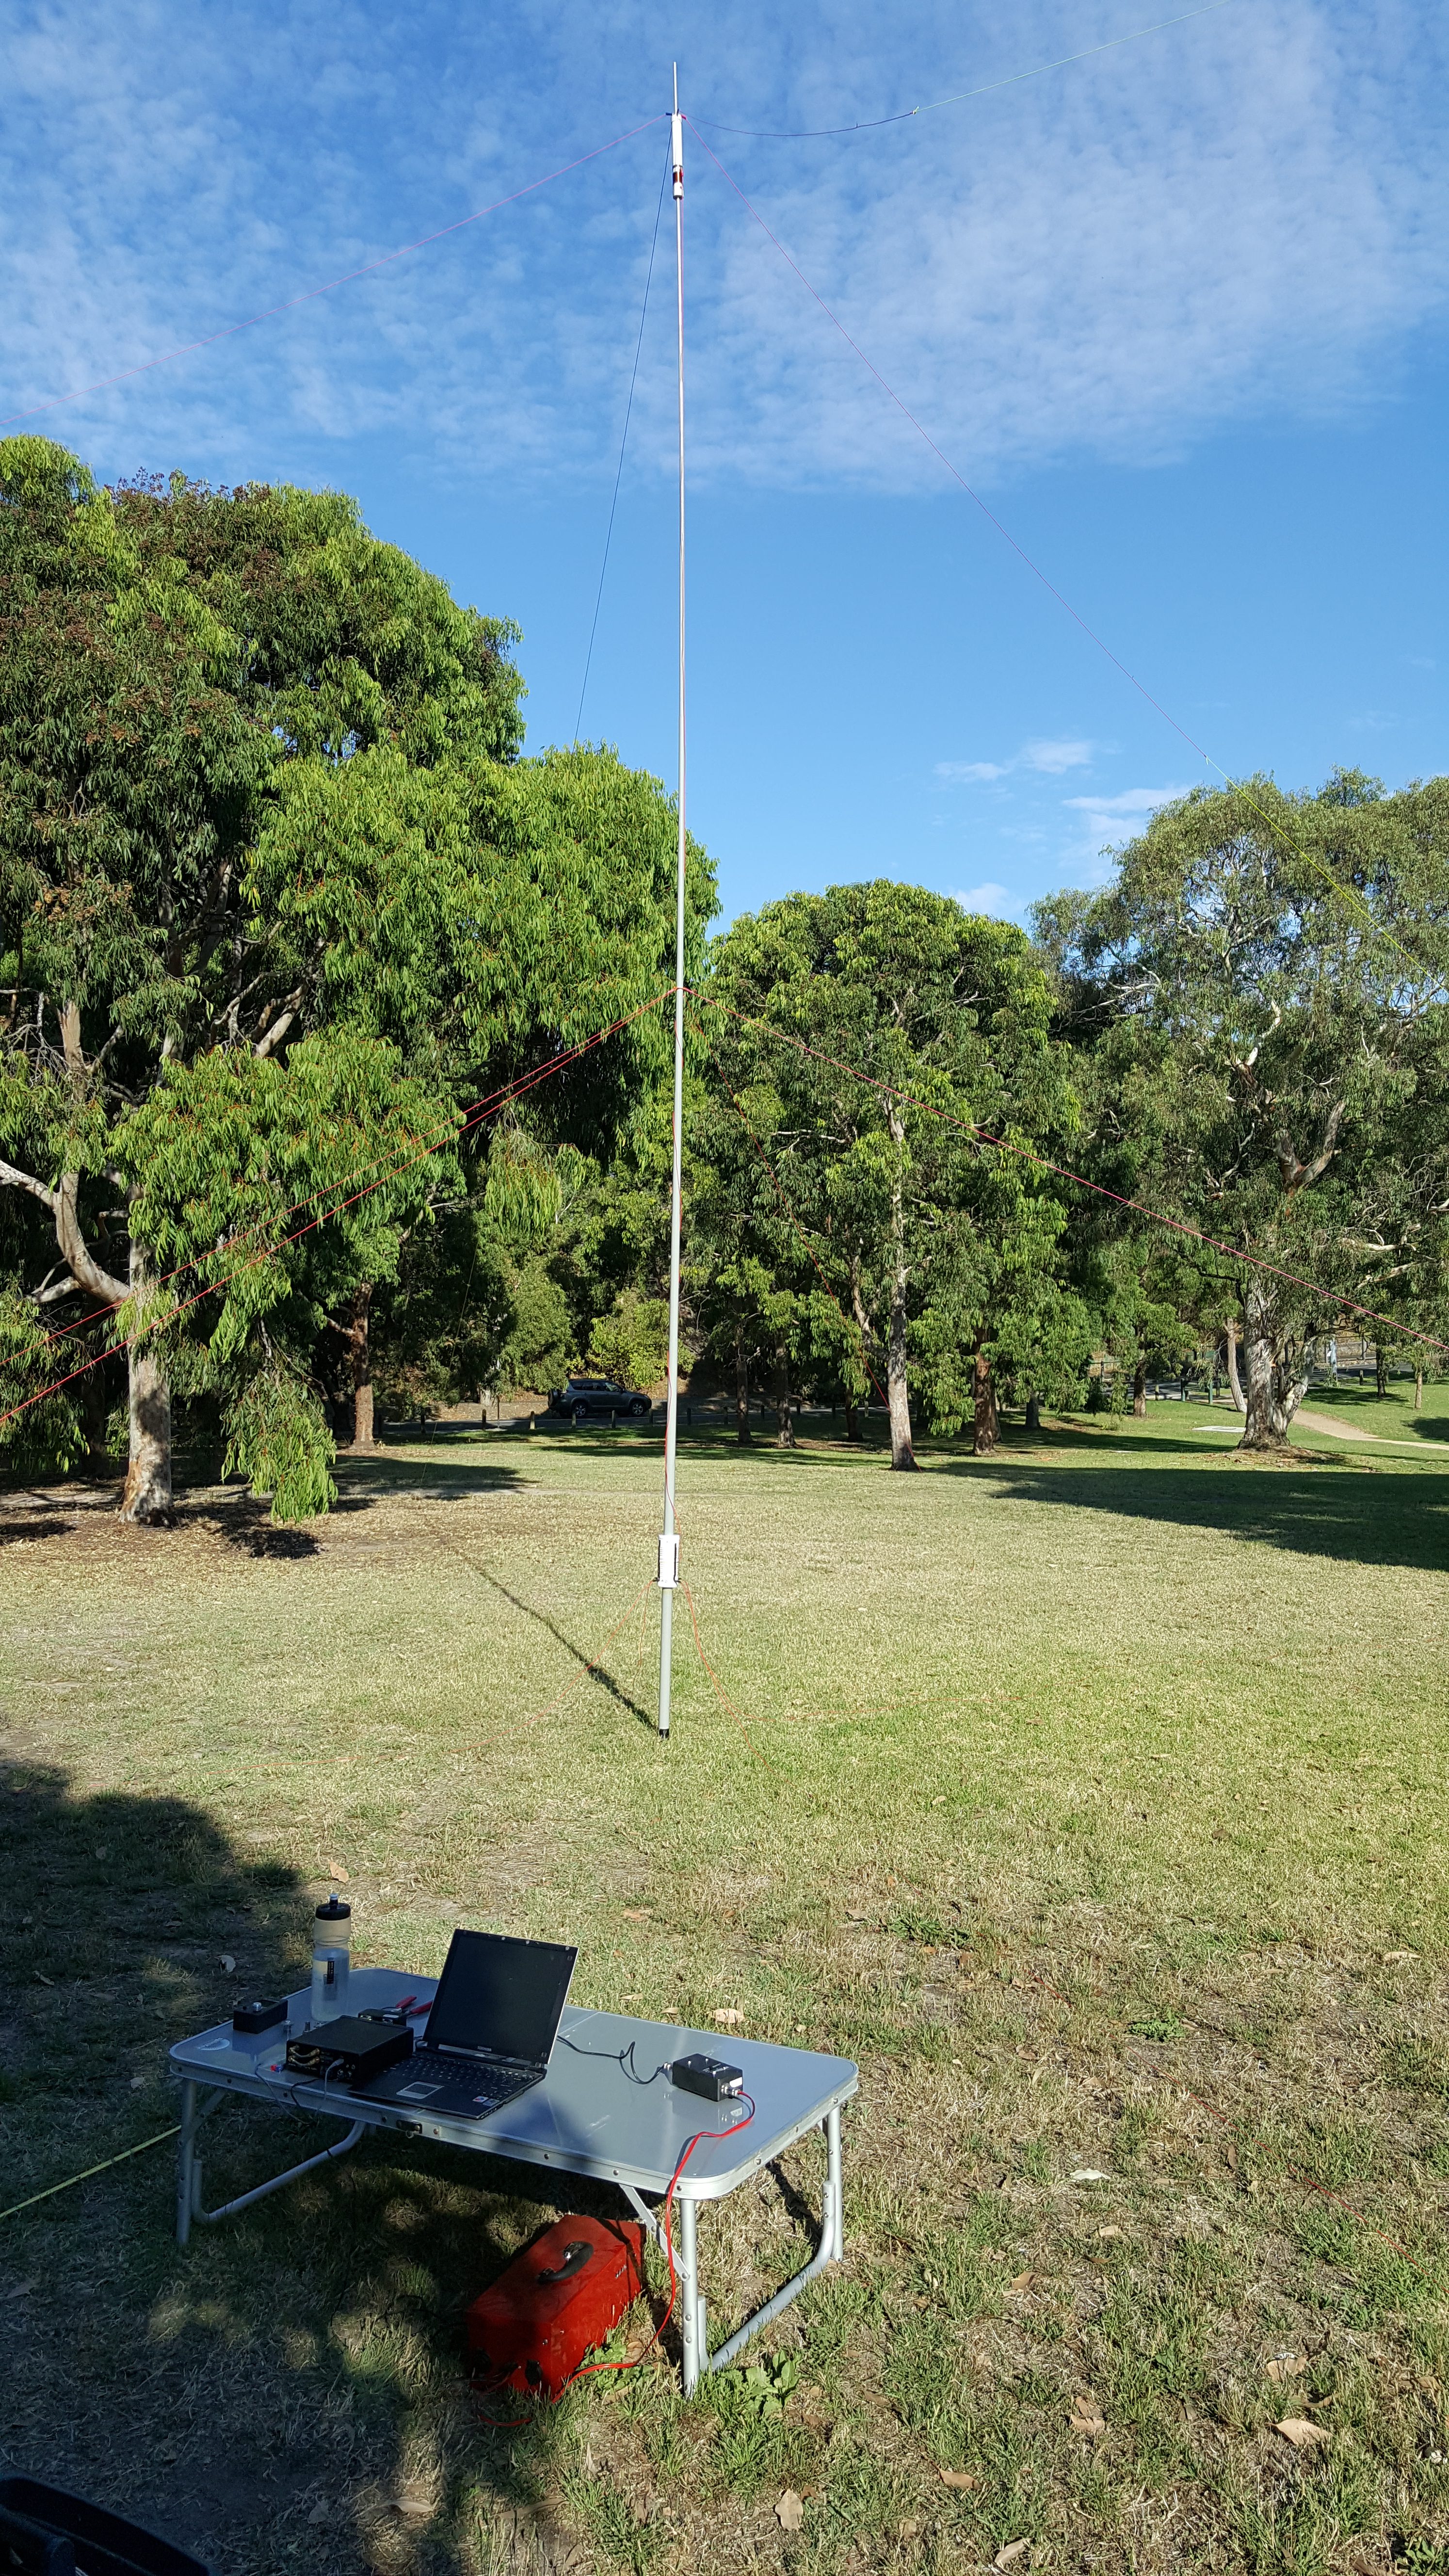
Tuning the antenna in the local park
To tune this antenna, I had to take it to the local park as it needs a lot of space to set up!
After much trimming, it tunes the full 160m and 80m bands by selecting tap points on the coil with an alligator clip connected to the end of the radiator wire. In practice I found that the tap points vary quite a bit depending on where the antenna is set up and so a SWR meter is necessary to tune the antenna on any site.
The 2:1 SWR bandwidth is about 39 kHz on 160m and around 110kHz on 80m – quite usable.

It all fits in a small box, so is quite portable.
The antenna packs up quite well, and could probably be carried in a backpack, but it would be heavy by the time you added the squid pole and radio.

The matching coil rather covered in frost
I successfully used this antenna on the SOTA 160m summit-to-summit weekend in April 2017 qualifying the summit on just 160m.
GDDY, Looking at the matching coil unit, what are the black mounting bits?
Regards
VK2FLN (John)
Hi John,
Thanks for your interest in the project. I think you are referring to the black items holding the wires of the base loading coil for the 160m antenna. These are cable ties that are threaded through holes in the PVC pipe to hold the loading coil turns in place. The ties are secured on the inside of the pipe to keep a neat appearance.
73 David VK3IL
Hi. Very interesting antenna you have been working in here.
I’m looking for a short topband and eight meter antenna but not for portable use but as base station antenna.
I will have a good look at this on so thanks for sharing.
73.
Paul
HS0ZLQ, G0MIH.